How to use this guide Our suggestion is to use this document as a reference while you are learning to interact with the platform: skim the guide to get an overview of the basic interactions and UI elements, and read more attentively the sections you are interested in. It will all become second nature as you grow more comfortable with the platform. |
Jump to:
The bottom interface (communicating)
The edit menu (transforming the space)
Changing your appearance
When a participant first visits an experience they will be presented with the Avatar Customizer.
Spaces are “public” by default, i.e. they are accessible to any visitor that knows the URL, even non-authenticated participants. When somebody that is not a user (or is not logged in) accesses a public space, they are asked by default to personalize their avatar.
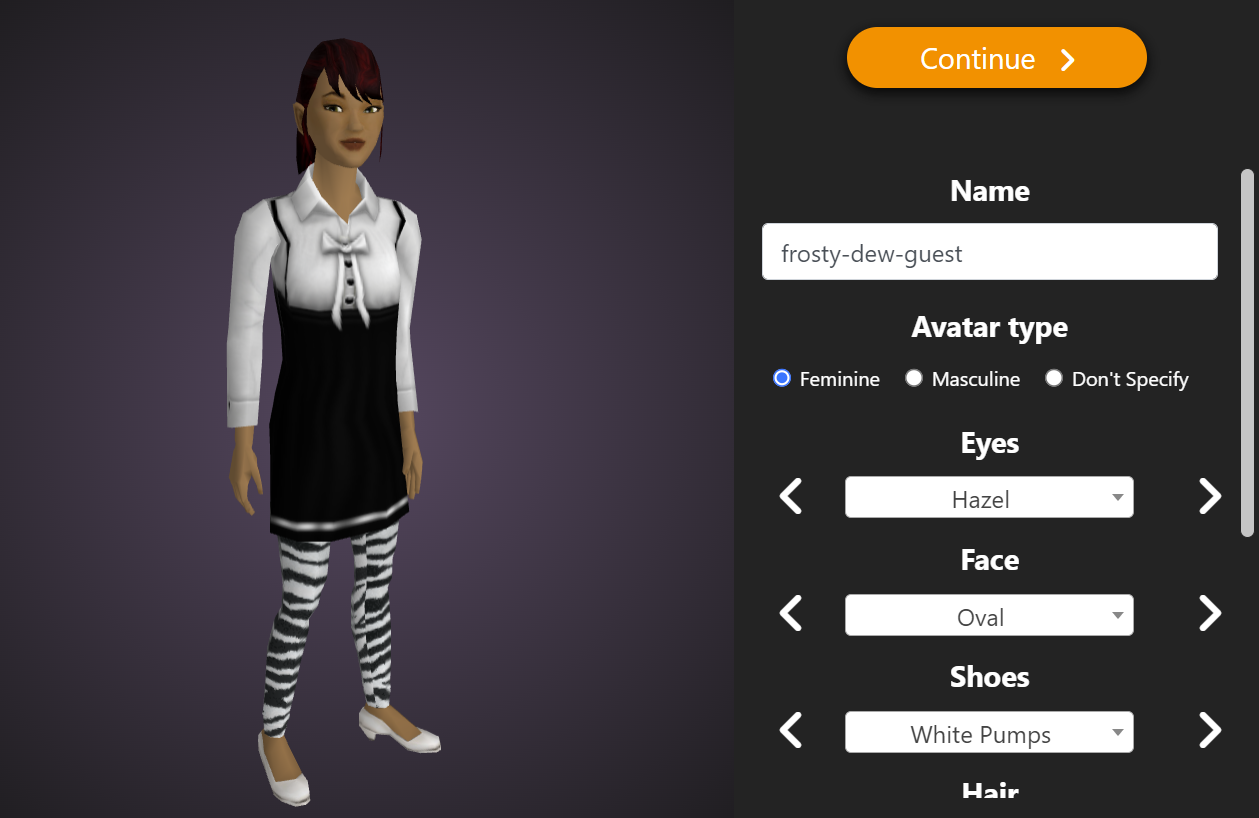
This screen, often called the “avatar creator” or “avatar customizer” in other guides, shows you a preview of the avatar’s appearance, as well as various menus to change it on the right side (these menus will appear at the bottom if the screen is small enough, such as a mobile in portrait mode).
By default a randomized avatar appearance is displayed.
In order from the top:
- The Continue button will save the avatar and bring the user to the 3D environment proper
- The Name field allows changing one’s username. If the user account is not authenticated, a random name will be generated.
- The Gender field allows selecting between a male-looking avatar, female-looking one, or one that’s non-gender specific.
- All fields below that control the appearance of a specific part of the avatar, such as the hair, shoes, or face. Click on the arrows on the left and right of the field to change.
When you are happy with the appearance of your avatar, click Continue and this appearance will be saved. If you access any other space, you will start with that appearance in the avatar customizer instead of the default “red-shirt” avatar.
This window can also be summoned within the 3D environment itself by clicking on the appropriate button in the side Menu (see “The side menu” below).
Looking around
When not in VR, you can click (or tap) and hold; moving the mouse cursor or your finger while keeping the hold will move the camera, using you as the center.
This is not always easy for users new to 3D environments, but a great analogy is that of dragging: if they drag either the cursor or their finger over the 3D scene, the camera will move. Neophytes might need a couple of minutes to adjust to this, but as this is a standard mode of interaction, if they have played any 3D games in the past they will already be familiar with this.
When in VR, you can look around by simply moving your head.
Moving in a space
One can move in the 3D environment by clicking on the blue hotspots that might be in the scene (‘teleporting to a hotspot”), or by clicking/tapping anywhere on the floor (“free teleporting/walking”).
To teleport to a hotspot click or tap on the blue circle on the ground, or on the blue indicator floating in the air. These types of hotspots are available on all spaces, and the templates Hyperspace provides all include some.
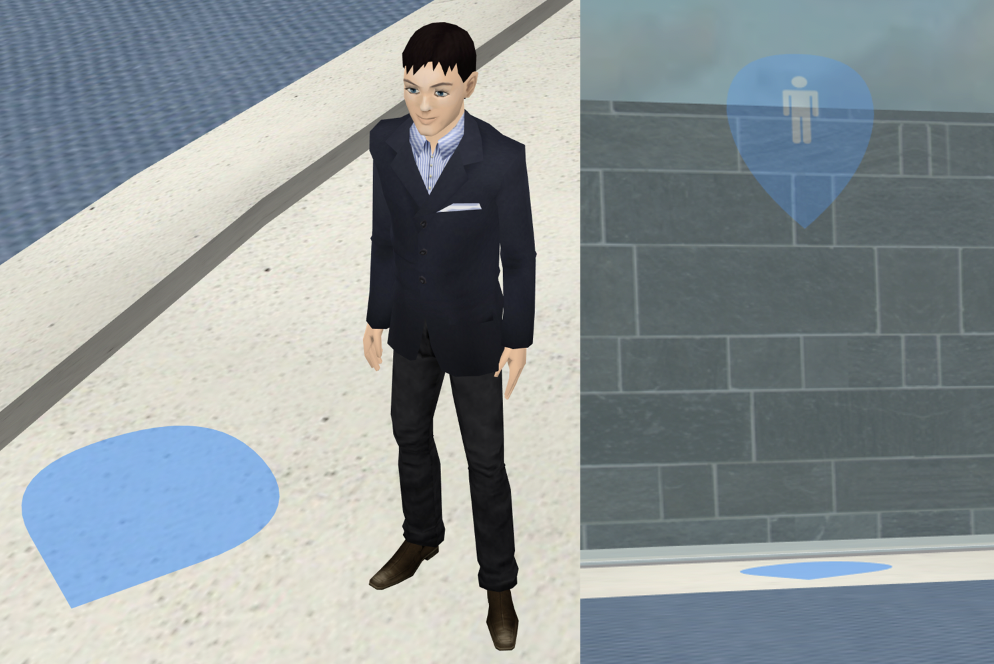
Free teleporting/walking
To use it point to anywhere on the floor you wish to go, a blue circle appears on the ground, click (or tap) to go there.
Interacting with the scene
Interacting with the elements of a scene depends on your device:
- With a mouse and on touch devices: clicking or tapping
- In VR, if an input device (such as a hand controller) is available: the “action” button of the input device (e.g. pulling the trigger input on a Meta Quest controller, or the hair trigger on the HTC Vive wands.
- In VR, if no input device is available: gaze. You will see a dot in the center of your view, if you “hover” over something that can be interacted with, a circular indicator will appear which will fill as you keep your gaze on the object.
The bottom interface (communicating)
Public chat and whispers
If you are in a multiuser space, you will see a white bar at the bottom, and a darker area on its right or above it (depending on your screen size). These two make up the chat interface.

On desktop, pressing any key but Enter and Esc will focus the chat and write there. On touch devices, the virtual keyboard will be shown after tapping on the text field as with any messaging app.
When written, the message can be sent by pressing enter, or clicking on the paper plane icon on the right of the text box.

Sent messages will appear in the darker area, situated either on the right or at the top of the white bar, depending on your screen size. This area has three buttons, from the bottom:
- Expand/collapse chat: clicking on this button will make the area used by the chat bigger (to provide more space) and darker (to make it easier to read messages). Tapping on it again will make it smaller.
- Show participants: clicking on this will open the participants window. Selecting any of the names will allow things like whispering, seeing a user’s profile, etc. On the side of the name a few icons might be visible


- A microphone if the user is currently on the call (which will change to a microphone with a slash over it if the user has muted their microphone).
- A camera if the user can share their video.
- A computer screen if the user can screenshare.
Close the Participants window by clicking the red X in the upper right corner.
- Show Q&A window: The question and answer (Q&A) window will open.

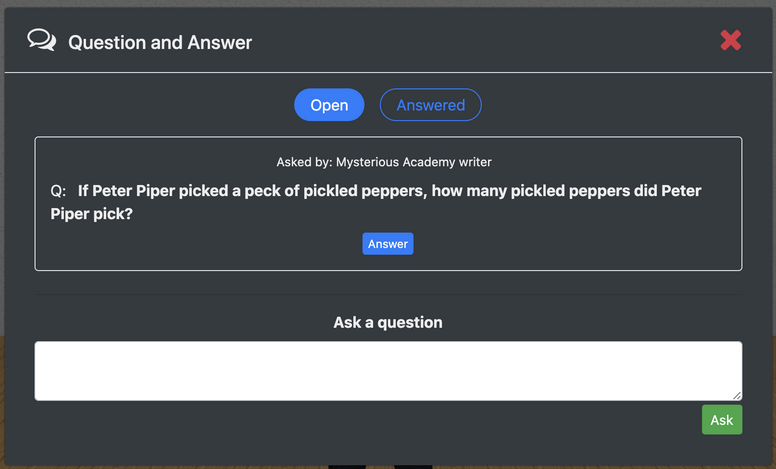
Close by clicking the red X in the upper right corner.
Public messages are sent by writing in the text box.

They are visible to anybody in the space, and will be available in the chat for a period of time (even if you reload).
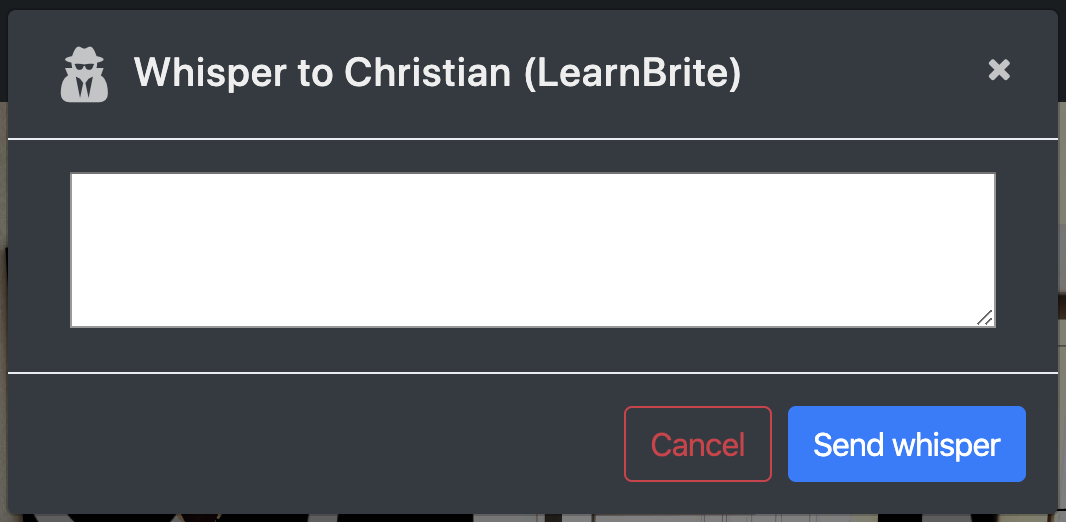
Whispers are private communication that only the sender and the recipient can see. They can be sent by clicking on a name in the chat, or by selecting “Whisper” after clicking on a name in the participant’s list.
Calling
Any multiuser space allows the users within it to join a call by clicking on the green phone icon in the bottom bar. If you are the first in the space, you might be asked to start broadcasting – go ahead and say yes if you’re about to get on a call.

When a call has been joined, the green phone icon will change to a red one . Click this new icon to drop out of the call.

You can mute your microphone by clicking on the microphone icon on the right-hand side of the green/red one. This icon shows your current “mute” status as well:
- You are not muted: tap on the icon to mute your microphone
- You are muted: tap on the icon to unmute your microphone


Video and screen sharing
In addition to voice conferencing, it’s also possible to share the video from your camera, and your screen.
Note that while these features are available in most modern browsers, some (like Internet Explorer 11, often called “IE11”) do not support them. If the browser does not support the feature, the icon will not be visible.
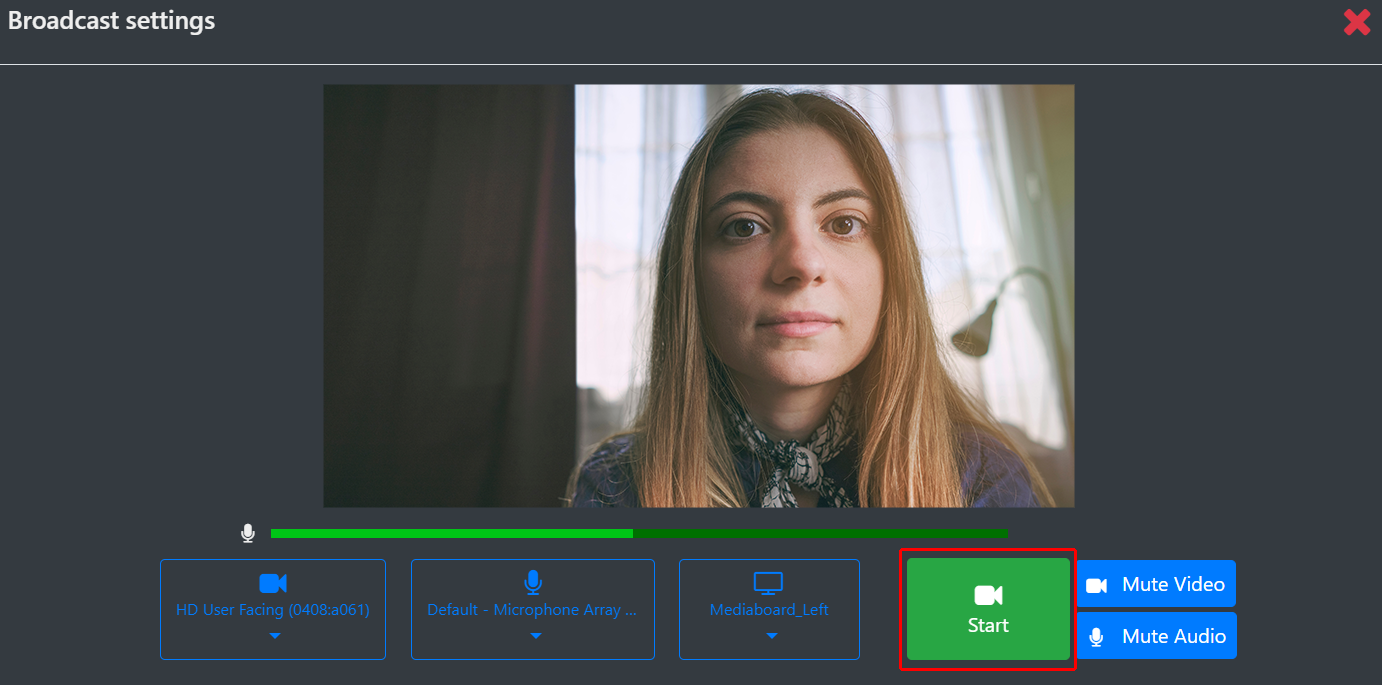
To share your camera,
- Click on the camera icon on the right side of the screen.
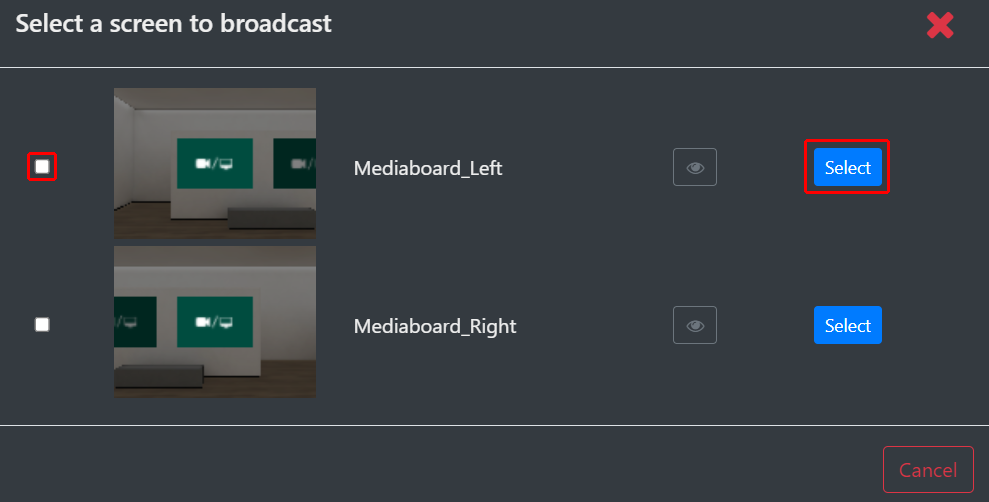
- A broadcast settings window will show you your camera image. Click mediaboard (screen within the 3D environment) to choose which mediaboard to broadcast.


- Select one by clicking on the checkbox or clicking Select
- To start sharing, click Start.
When you start sharing, the camera button will have an x added to it . If you click on this button now, the same popup will open, but it will now have a red Stop sharing button, to turn off your video.

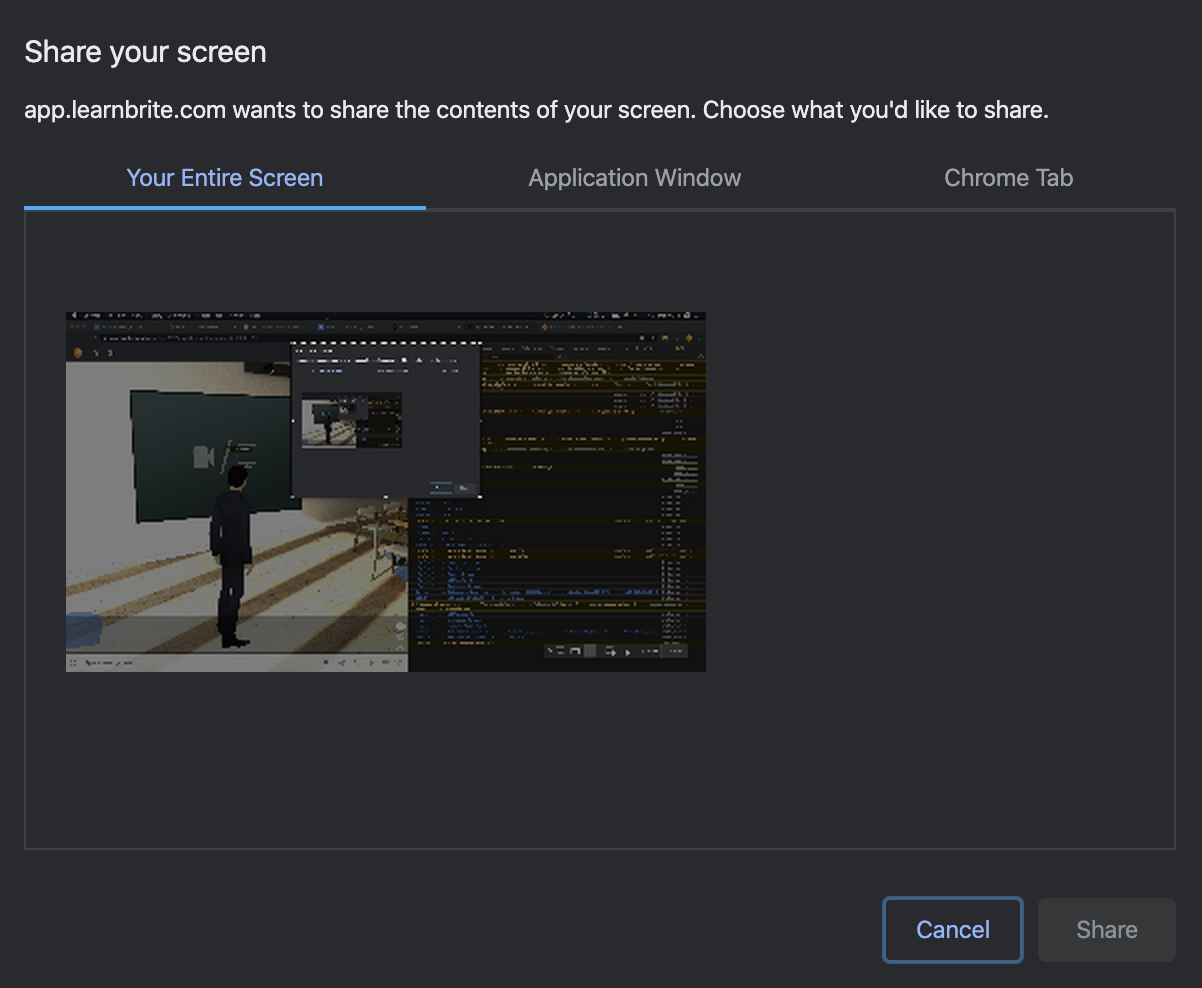
To share your screen, the process is much the same:
- Click on the “computer screen” icon .
- Select the mediaboard you want to broadcast on (step 2 of the process to share your video, described just above)
- Select what you want to share in the popup that appears now: your entire screen, just an application, or only a single tab.
- Click Share

As with video, when you start sharing the button will change and have an x on it . Clicking on the button when in this state will open a popup that allows you to stop sharing.

Using gestures (animations)
By clicking on the smiley face icon on the left side of the bottom bar, a shortlist of animations will appear. Clicking on any of these names will make your avatar animate.

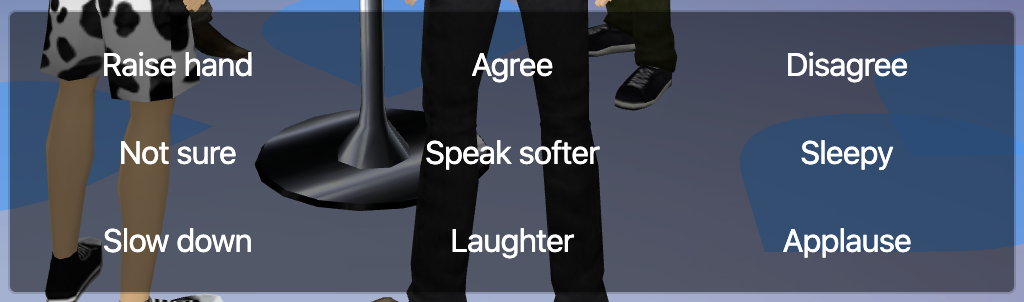
Gestures can also be triggered by writing /[gesture name] in the chat (for instance /dance). A full list of gestures is available in the in-depth guide on Hyperspace academy.
Controlling a conversation
Conversations with a bot are a big part of micro-learning modules. The platform allows for full control over them.

This menu, located at the bottom of the screen when a conversation has started (usually triggered by clicking or tapping on an avatar), includes:
- Go back in the conversation
- Pause/play the conversation
- Go forward
- Mute/unmute audio
- Toggle closed captions on/off


The top interface

- Open the side menu – check the “Side Menu” section below. On newer versions, after a few seconds the logo will change into the typical “hamburger menu” icon
- Navigate to other locations – if you are in a world (a group of connected spaces), you can navigate change your location through this
- Show achievements – many spaces have gamification elements included; through this menu you can see a list of your achievements within the space or world
- Open the edit menu – the edit menu is where you can change the room – see “The edit menu (transforming the space)”. Only available to the owner (or Editors) of the space or world.
- Open the participants window – Selecting any of the names will allow things like whispering, seeing a user’s profile, etc.
- Invite others – Share your space with others via email, Slack, Whatsapp, etc
- Change “view mode” – Used to change between third- and first-person mode, or enter immersive VR
- Open the “additional options” menu – see “Additional options” below


The edit menu (transforming the space)
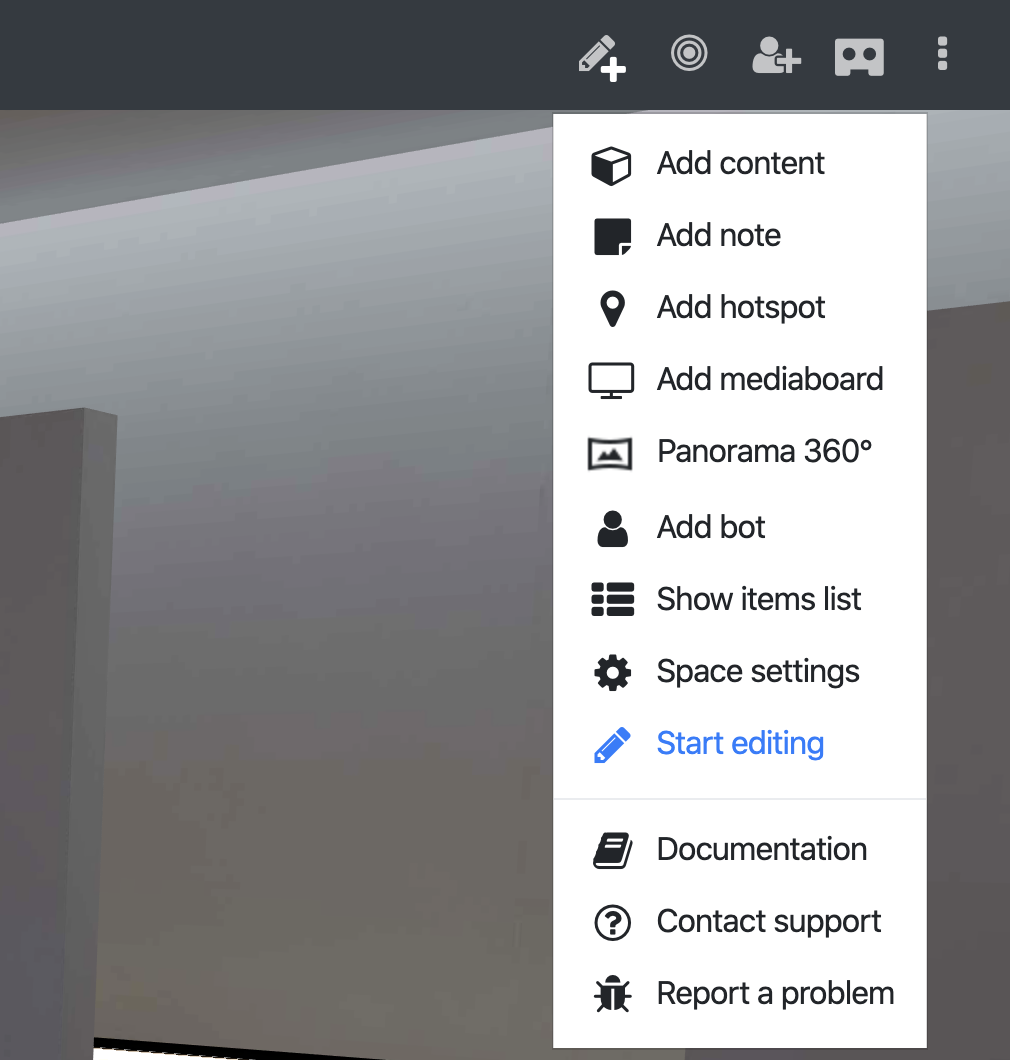
You can find an introduction to editing a space in the “Introduction to editing” guide.
Side menu
Opened by clicking on the logo or hamburger menu icons in the top left of the interface.
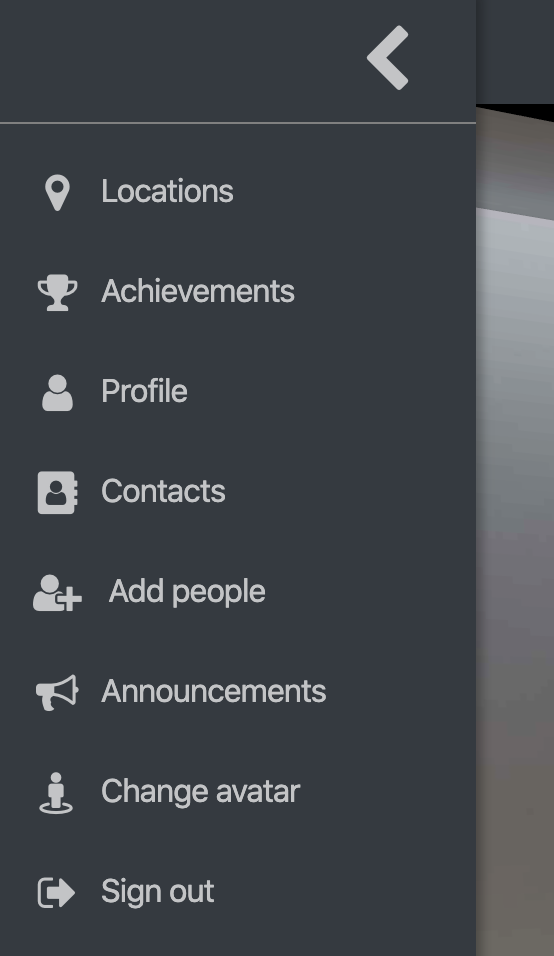
Some of these functions are already included in the top interface and are included here only for convenience, such as “Locations”, “Achievements”, and “Add people”. The others are:
- Profile – modify your profile, which others can see if they are in your same space or world
- Contacts – a list of contacts within the Hyperspace platform, here you can display them and manage new contact requests
- Announcements – if you are an Owner, Editor or Presenter in a space you can send specially formatted messages. If you are in a world, the message will reach users across all spaces in that world. Announcements appear as text messages in the chat area and optionally can be spoken using text to speech in 50 language accents.
- Change avatar – bring up the avatar editor (see “Changing your appearance” section)
- Sign out/Sign in – sign in or out of your account


Additional options
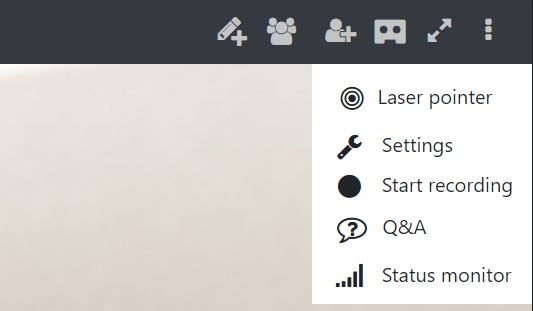
Opened by clicking on the “triple dot” icon in the top right interface. Functions in this menu are related to the space or world you are in.
- Laser pointer – very helpful to indicate things to others both in the 3D space and in VR!
- Settings – user-specific settings, such as audio, SFX or speech volume
- Start/stop recording – Records the experience locally and exports a video file. This feature can be enabled/disabled for different roles in space/world settings.
- Q&A – open the Question and Answer (Q&A) window.
- Status monitor – a feature that informs users and Editors about the quality of their connection, as well as the performance of the 3D environment on their device.
You can find out more about the Status monitor in the Status Monitor Guide.


