This page details a number of How-to tips that might be helpful in using the platform.
Jump to:
Change the settings/properties of an object in 3D?
Add a screen/camera share mediaboard?
Invite other users to a space/world from the 3D environment?
Show an image when clicking on a mediaboard
Delay a conference call prompt until the initial dialog has finished?
Change the settings of a space/world?
Invite other users to a space/world from Dashboard?
Change the role of an invited user to a space/world from Dashboard?
Lock an invited user from a space/world?
Change the version of a space/world?
Copy/duplicate a Space or World?
Reset browser permissions (e.g. Camera, Microphone, VR)
Provide access to my users without registering them on LearnBrite?
Authentication
Sign in?
Please see the Sign in guide: https://learnbrite.com/academy/how-to-sign-in
3D environment
Move an object in 3D?
When an object has been added, it can be moved in one of two ways. The first is quick to activate and is great for placing the object – if you then need to nudge it, or rotate it a bit, or scale it only a tiny amount, the more precise controls are described below.
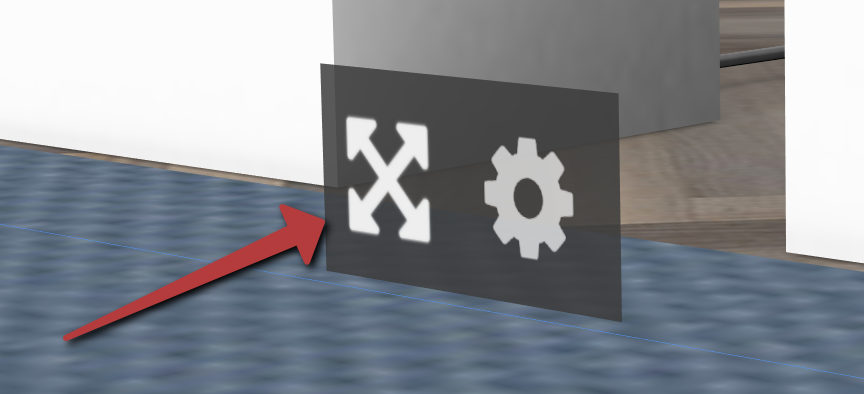
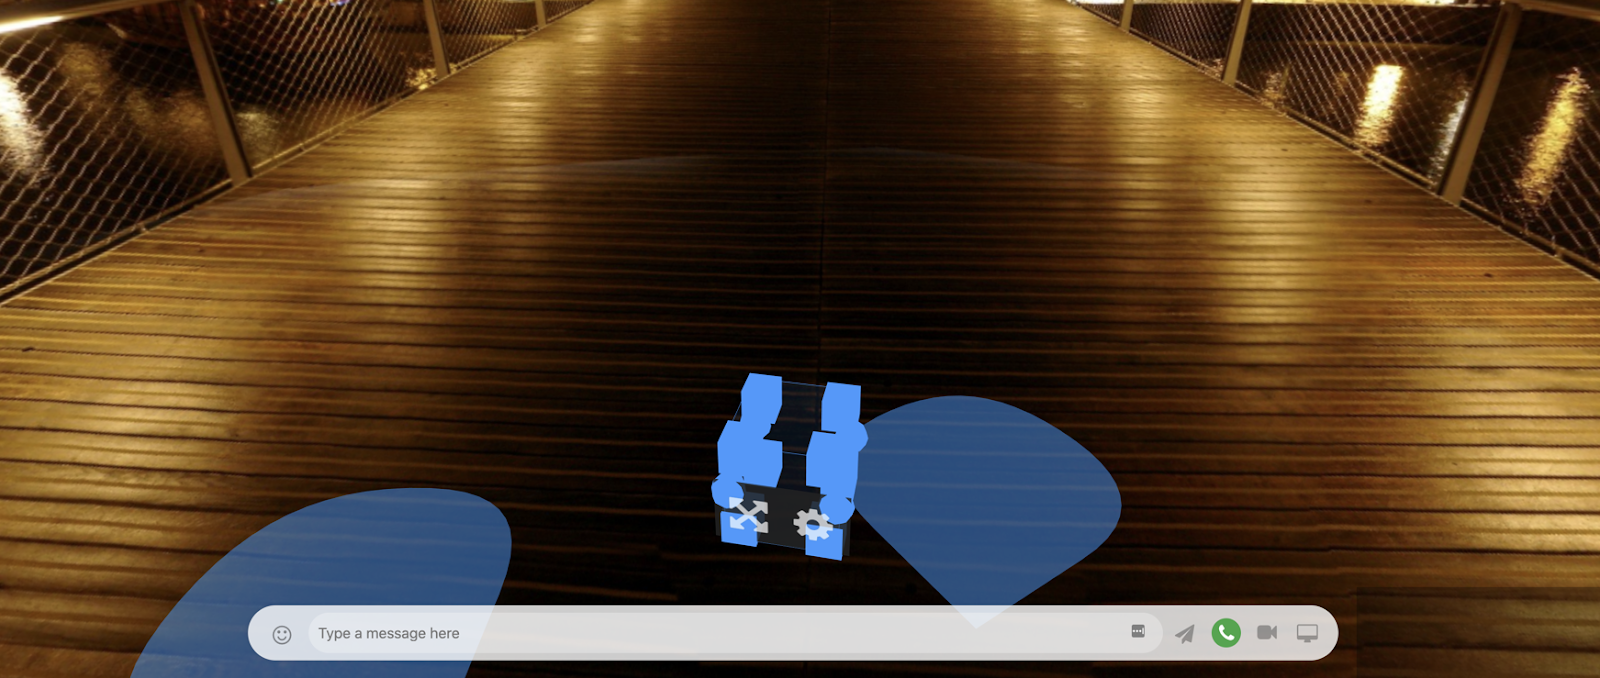
To place an object quickly, enter edit mode, hover over the object, and click on the crossed arrows to activate “move mode”.
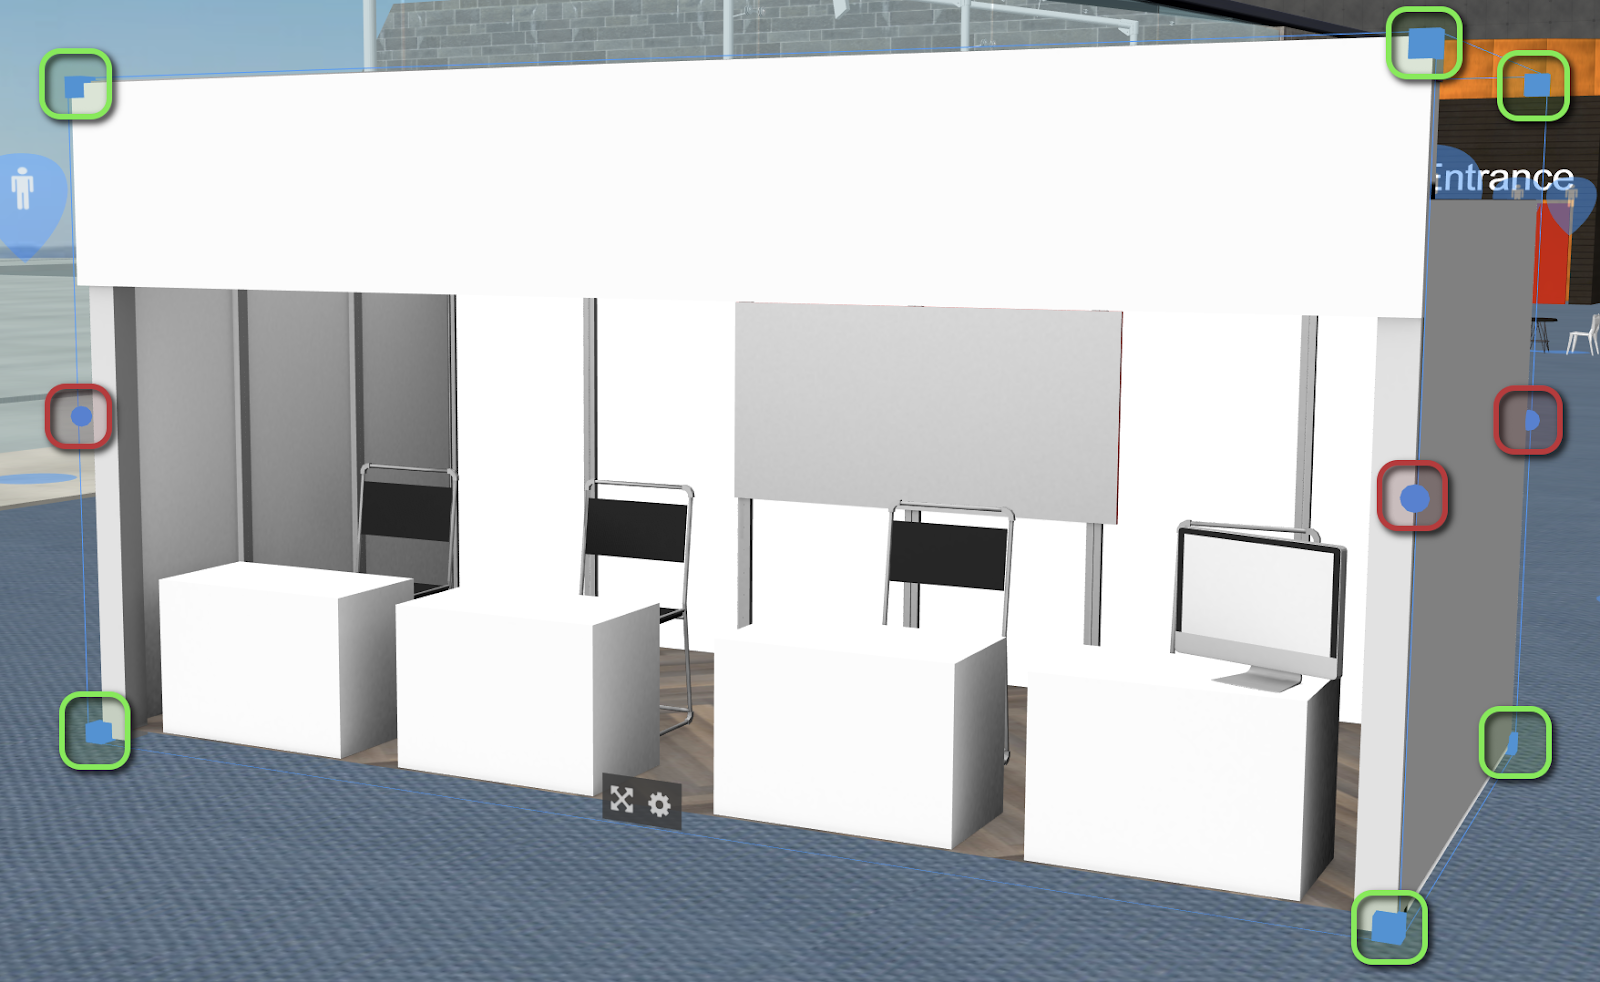
The object can now be moved by dragging it to the desired position, rotated by dragging on the blue spherical gizmos on its middle section (in red, below), and scaled by dragging on the blue cube gizmos on its corners (in green, below). Move mode can be disabled by clicking on the crossed arrows again.
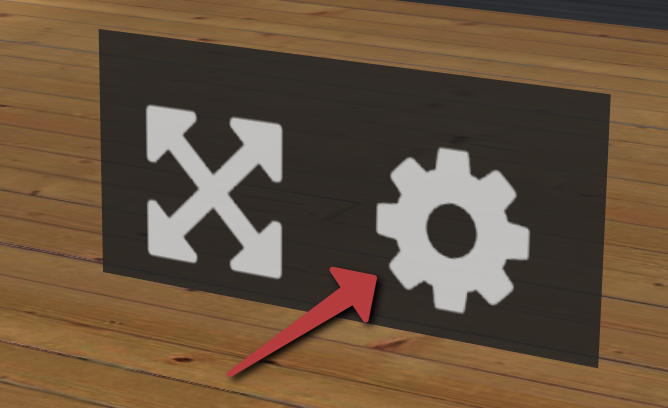
If you need precise movement, you can instead activate the advanced controls. Enter edit mode, hover over the object, and click on the cog icon. At the bottom, click “Show advanced transform controls”. For a demonstration of the functionality, please see this video: https://www.youtube.com/watch?v=OgqySK_4C2M
Change the settings/properties of an object in 3D?
Open the edit menu as before and select Start editing at the bottom; you will enter Edit mode.
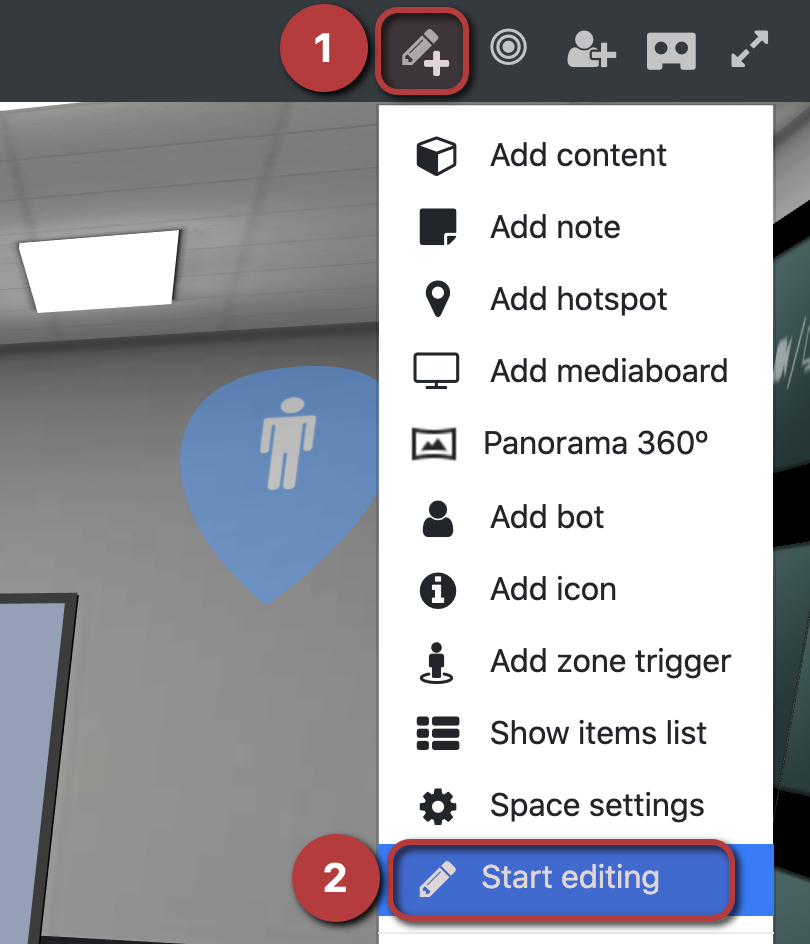
Then, hover over the object, a small panel will appear. Click on the cog icon and the object’s properties will appear.
You can also find a full list of objects in the scene by selecting Show items list in the edit menu.
Add a mediaboard?
Instructions for different content types are described throughout the document where relevant, but the general process to add a mediaboard is:
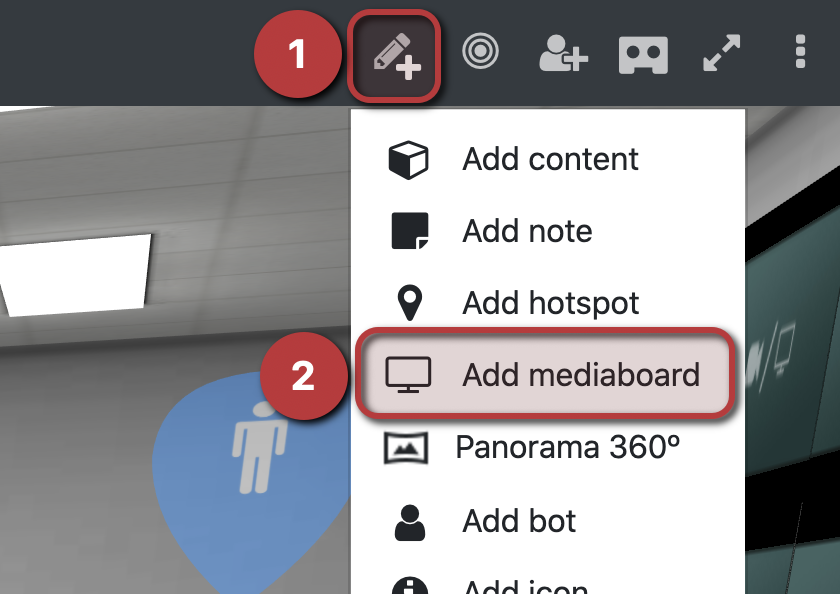
- Open the edit menu and select “Add mediaboard”;
- Paste your URL in the input box at the bottom;
- If you want the content to always open in a new tab, click on “Advanced”, and then check “Force link to open in new tab”.
- Click “Create”.
After a second or two, a new mediaboard will appear in the 3D space in front of you.
Add a screen/camera share mediaboard?
- Open the edit menu and select “Add mediaboard”
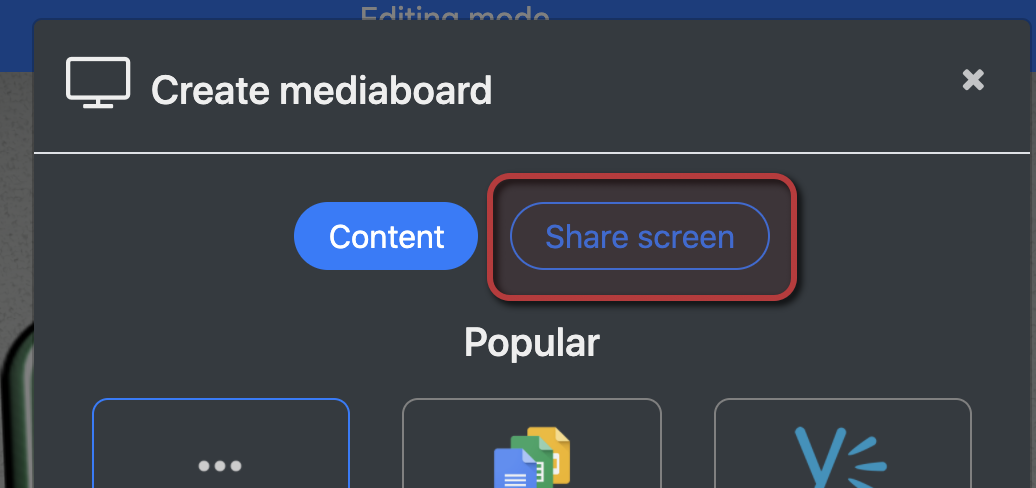
- Select “Share screen” at the top
- Click “Create screen share”
Add a box trigger?
- Open the edit menu
- Click on "Add content"
- Search for "Transparent box trigger", and click on that option when it appears. It will say "Learnbrite" below its name
- Move the box to the front of the door, rescaling it so that it covers the whole door area.
- Note that you might need to look for it for a bit because it's transparent, but it's usually spawned in an area in front of you
- Hover over the transparent box, and click on the cog icon
- To see the cog icon you'll need to be in edit mode (blue bar at the top); you should already be, but just in case, you can trigger it in the edit menu (edit menu > Start editing)
- You can now add the behaviour you want to the trigger box!
Add an audio zone?
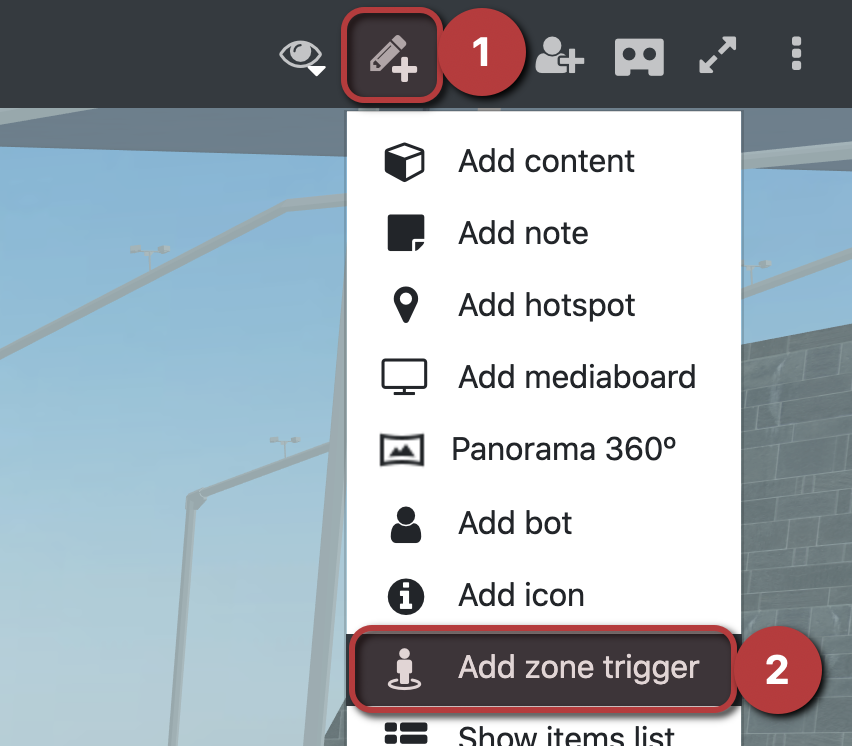
Audio zones can be added from the edit menu, by clicking on Add zone trigger.
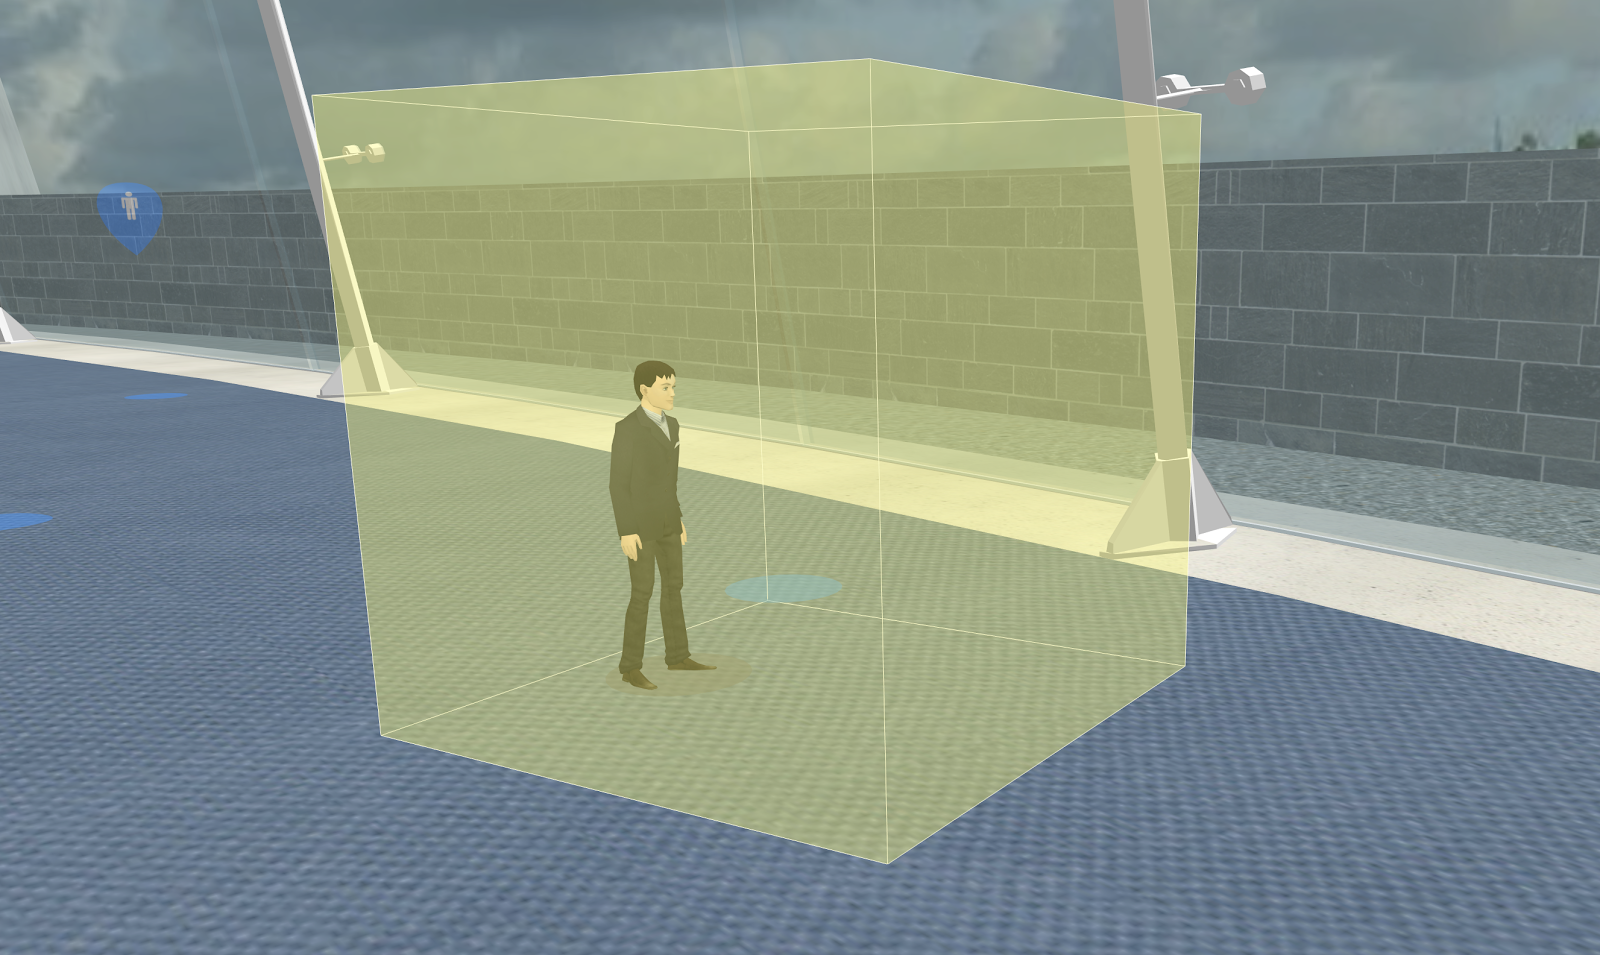
A yellow box will be created around your avatar: this is the area in which the audio zone will be effective, and can be scaled in all dimensions to fit your requirements. The box will not be visible outside of edit mode.
To enable the audio zone, you will need to add a Conference ID to it, which you can do from its properties (see the “How do I… → Change the settings/properties of an object in 3D?” section). The Conference ID can be any string of lowercase characters (special characters and numbers are not allowed). Any two audio zones sharing the same Conference ID will be effectively the same call.
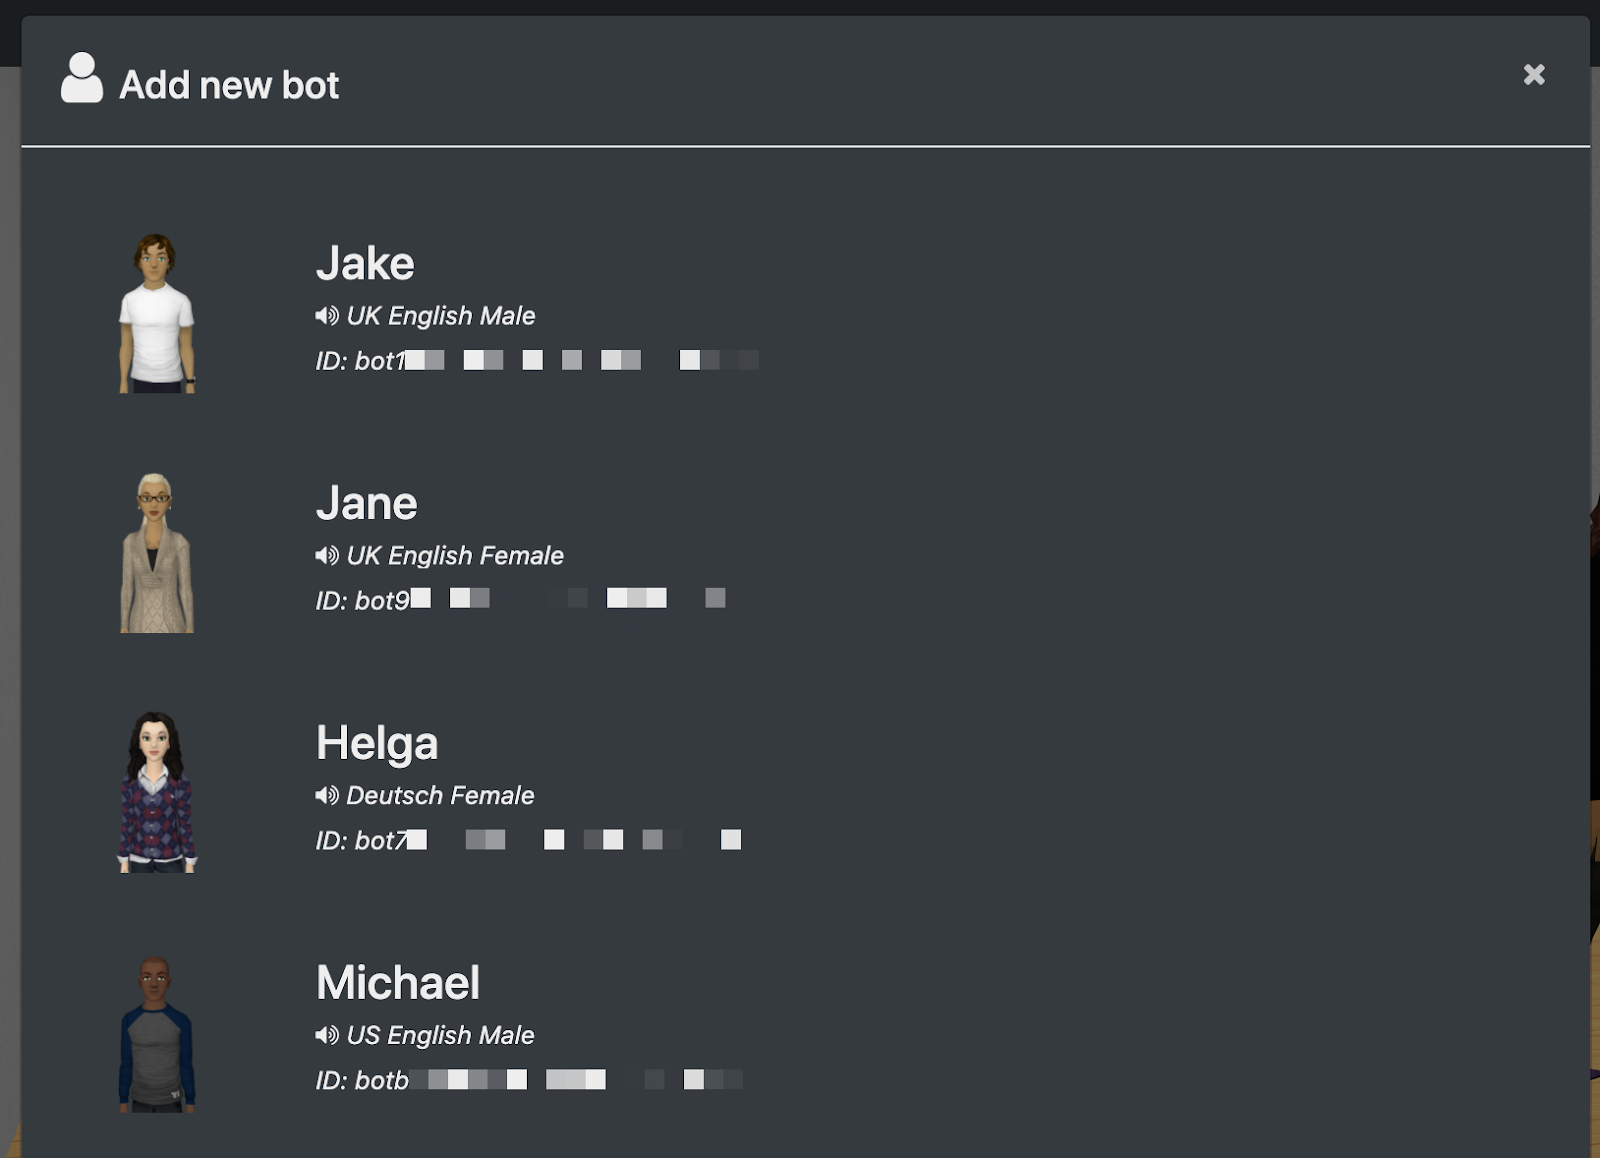
Add a bot?
In order to add a bot to the 3D environment, make sure you have created one that suits your requirements on the Bots app (https://app.learnbrite.com/bots). For help with the bot creation process, see our Avatars & Bots guide in the Academy. |
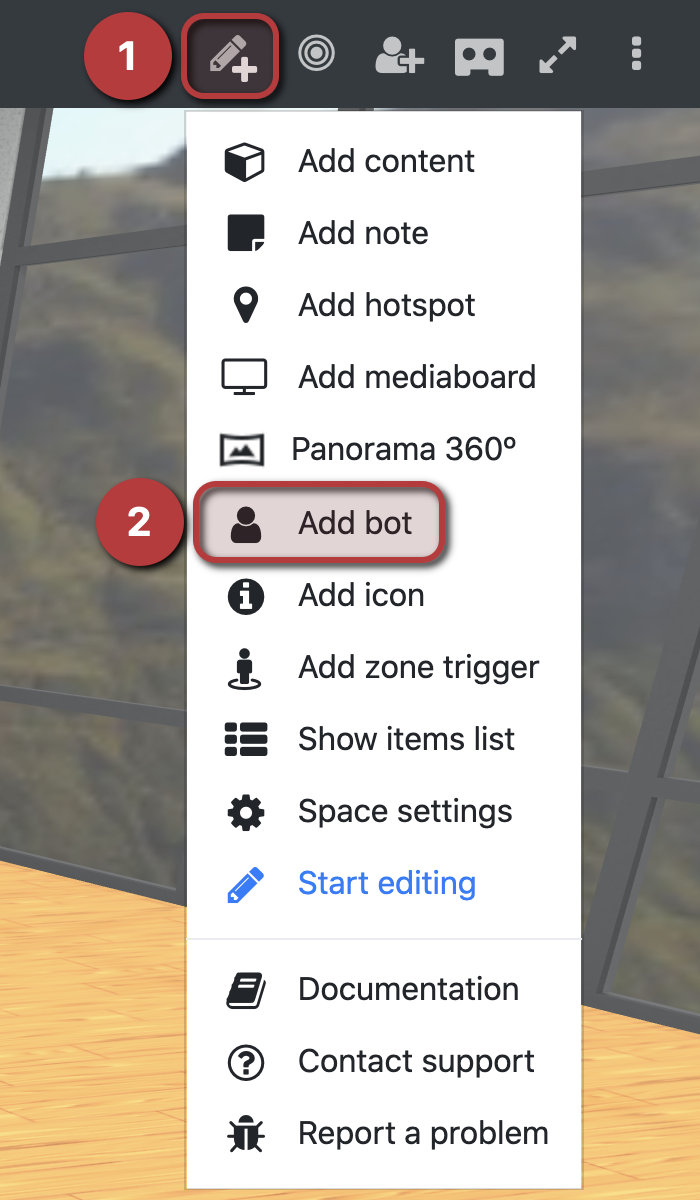
Inside the 3D environment, open the edit menu and click on Add bot
A popup will open with the list of all your bots. Click on the bot you want, and it will appear in front of you in a second or two.
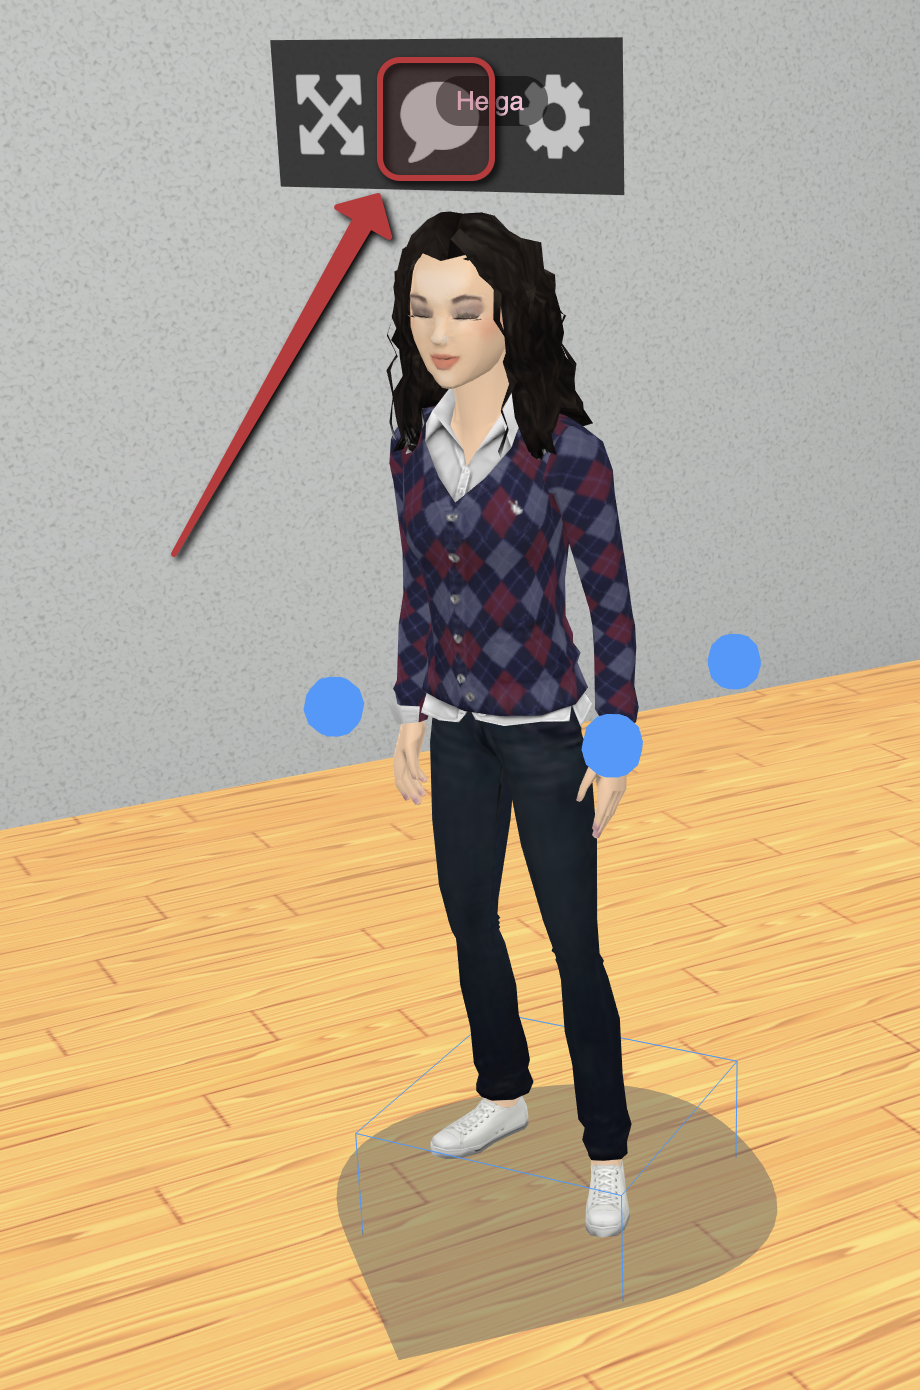
Add a conversation to a bot?
You can make a bot follow a script by entering edit mode, hovering over it, then clicking on the speech bubble icon.
Invite other users to a space/world from the 3D environment?
This is only possible from version 2.13 onward. For earlier versions, Editors must be invited from Dashboard |
To do this, you must be an Editor.
- Click on the icon
- Write the person’s email address and name in the “Invite by email” section
- Select “Editor” from the dropdown
- Click “Send invite”


Show an image when clicking on a mediaboard
This can be done by using the displayImage action in the mediaboard, see the Mediaboard guide and details on the displayImage action.
Play ambient music?
See Scenario Audio → How to direct audio within the 3D environment → Ambient
ChatMapper
Delay a conference call prompt until the initial dialog has finished?
- Ensure that “Force users to join audio call” is disabled in the “Experimental settings” area of the Dashboard (see Dashboard setting below)

- In the ChatMapper file, create an empty node after the final node of the introductory dialog.
- Add the following code into the Script Editor for the new node:

LB.uiController.modals.audioConferencing('forceJoin'); |
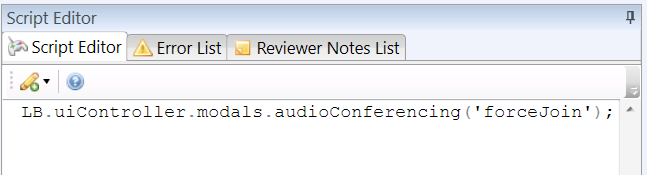
The user will then be prompted to join the call only after the introductory dialog has completed.
Dashboard
Change the settings of a space/world?
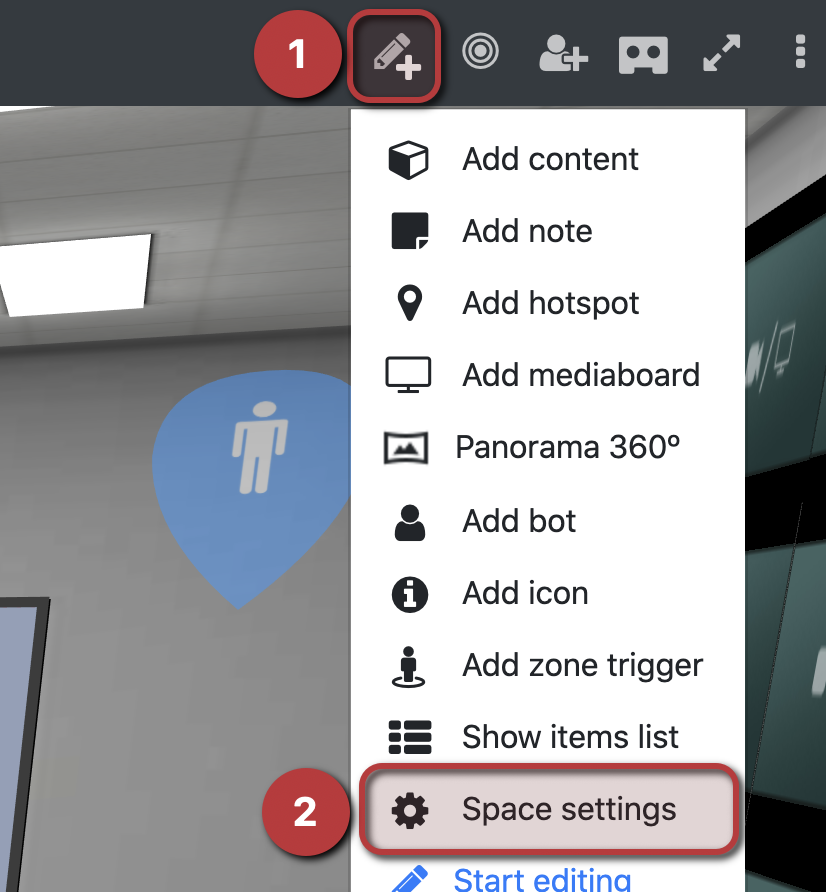
If you are inside the space whose settings you want to change, you can jump to the settings list through the edit menu.
Otherwise, open the list of spaces or worlds in Dashboard, then click on the “more” menu on the space/world whose setting you want to change, and choose “Edit space” (or world).

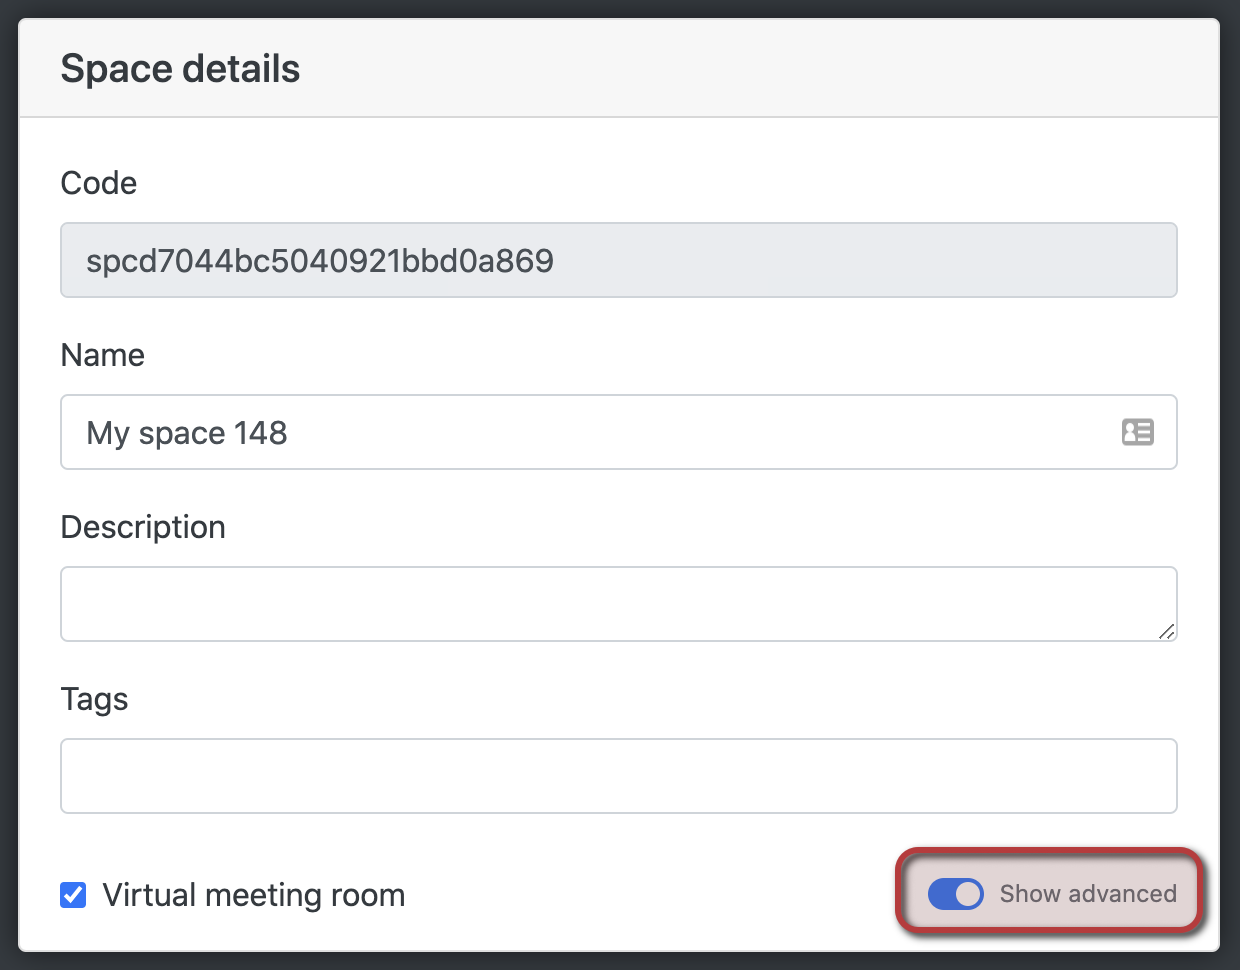
Whichever method you choose, the “Edit” page will open. Click on Show advanced.
Find the correct setting category you are looking for, then click on it. Almost always it will be mentioned alongside the setting name in instructions.

The list of settings in that category is now visible, you can change your setting and then click “Save” at the bottom.

Priority order of settings
You will undoubtedly notice that some settings are present for both worlds and spaces. This is because with worlds there is often the need to set some world-wide defaults, but some spaces within those worlds require different ones. The system will therefore take into account both world and space settings when loading the 3D environment in this order (each step overwrites the steps before):
- “Default” world settings (i.e. settings for the world as it was created, unmodified)
- “Default” space settings (same as above, but for a space)
- “Custom” world settings (settings that were changed manually after the world was created)
- “Custom” space settings (same as above, but for a space).
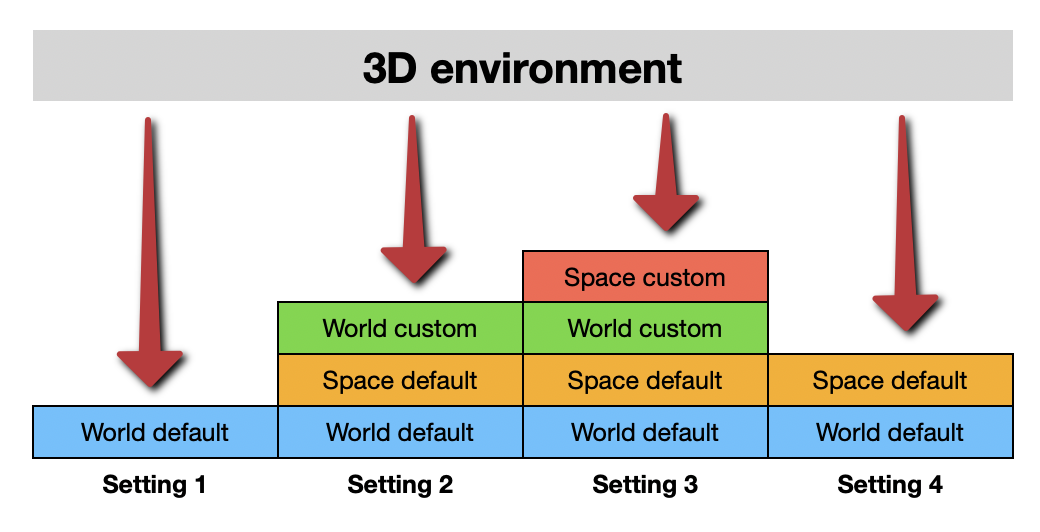
All in one line, they are related to each other in this order (where each ⤺ means “overrides”)
World default ⤺ Space default ⤺ World custom ⤺ Space custom |
You can visualize these relationships as blocks stacked on top of each other. The 3D environment “looks” at the settings from above, and so whichever value is at the top of each stack hides the ones below.
Let’s make a few examples with the following setup:
- A world in which only the “Private” setting has been enabled after creation, everything else is left as the default
- “space1” within that world in which all settings are default
- “space2”, also within that world, in which the “Private” setting has been manually set to “Disabled”
We then have the following scenarios:
- For settings that are only supported for worlds (e.g. “World invites from spaces” in Basic settings), the default of the world will apply as no such setting has been changed manually in our setup:
World default
- When loading space1, all settings that can be set for both world and space have the space’s default, because:
World default ⤺ Space default - The “Private” setting in space1 will be the world’s, because it was set manually:
World default ⤺ Space default ⤺ World custom - The “Private” setting in space2 will be space2’s, because the manual setting on the space will override the manual setting on the world:
World default ⤺ Space default ⤺ World custom ⤺ Space custom
Invite other users to a space/world from Dashboard?
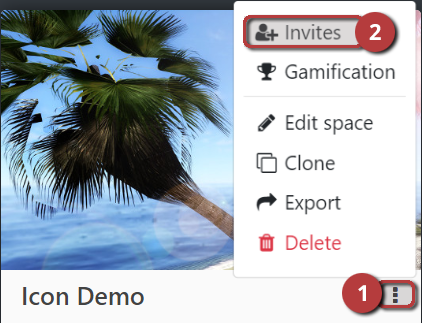
The list of invitees of a space/world allows to send new invites and manage existing ones. It can be seen by opening the menu of a specific space (or world) and clicking on Invites

A new page will open, where existing invites can be managed and new ones added.
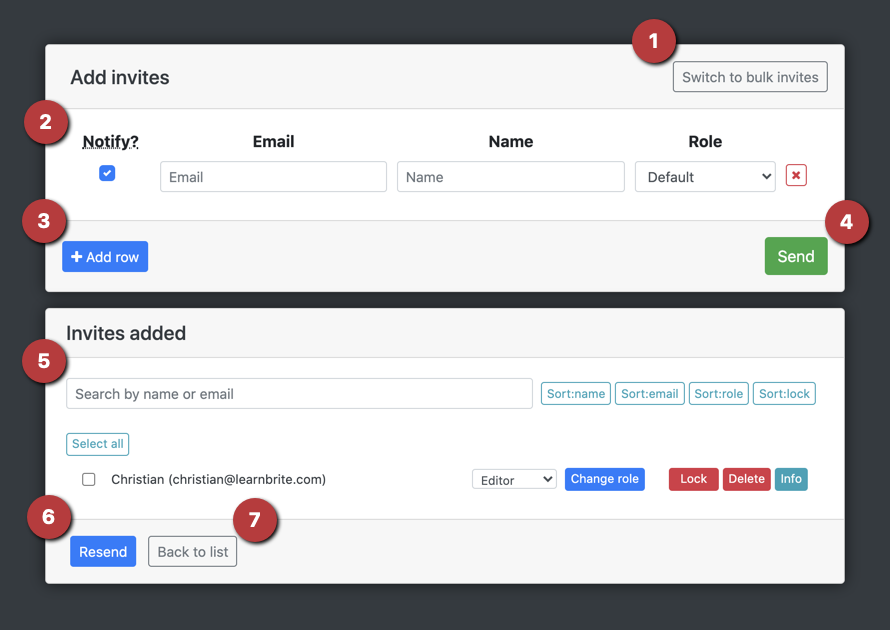
- Switch between single and bulk invites: single invites are sent one-by-one and allow setting a role for that user (currently in the image). Bulk invites are created using a comma-separated list.
- New invite: this row shows the field used in sending a new invite.
- Notify: if checked, an email will be sent to the recipient
- Email: the recipient’s email
- Name: the recipient’s name. Note that they will be able to override it within the 3D environment
- Role: the role the user will have in the environment. See User Roles
- Add a new row: to add multiple invites
- Send: send all invites whose information has been filled in
- Manage existing invites: search, sort, select specific invites, delete them, etc.
- Resend: re-send an email for any of the selected invites (i.e. the invite’s checkbox has been checked). Note this only applies to existing invites – it’s not connected to adding new invites.
- Back to the list of spaces or worlds
Change the role of an invited user to a space/world from Dashboard?
Access the list of invitees of a space/world by opening the menu of a specific space (or world) and clicking on Invites.
A new page will open. In the Invites Added section, check the box next to the user whose role you want to change:
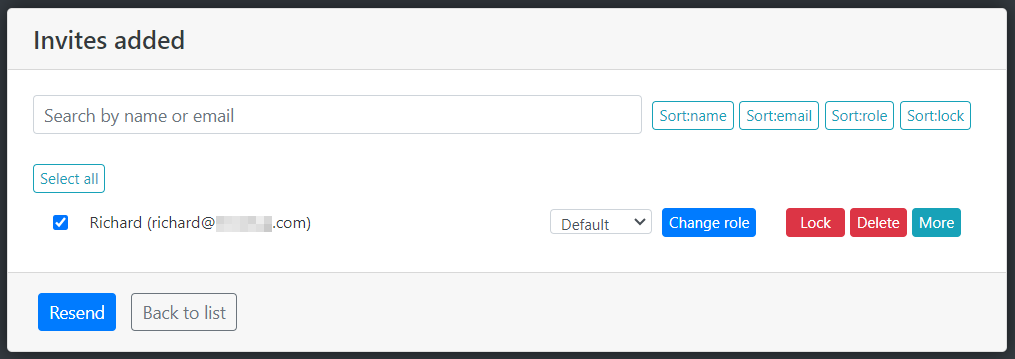
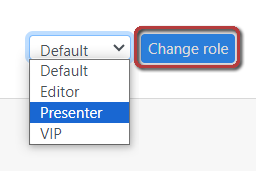
Select the users new role from the drop down list next to Change role, then click the Change role button:
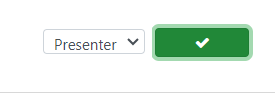
Change role button will become green with a check, confirming the user role has been changed.
Lock an invited user from a space/world?
Access the list of invitees of a space/world by opening the menu of a specific space (or world) and clicking on Invites.
A new page will open. In the Invites Added section, check the box next to the user you want to lock:
Click the Lock button:

The Lock button will change to a check, then to the Unlock button:
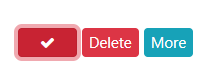
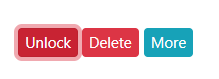
To unlock the user, simply click the new Unlock button.
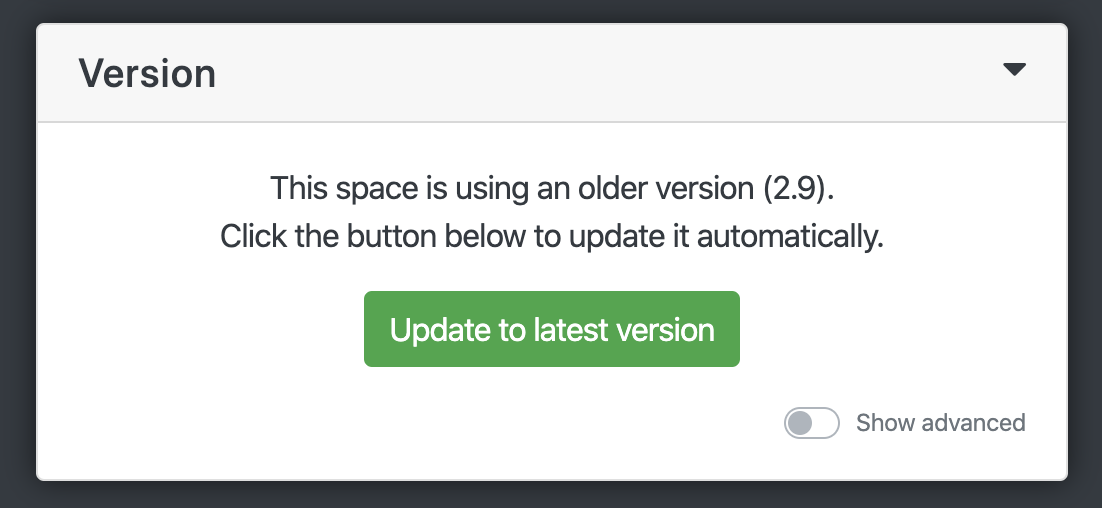
Change the version of a space/world?
You can change versions through the settings of a space/world, from Dashboard.

In the new page, toggle “Show advanced” on the bottom right corner
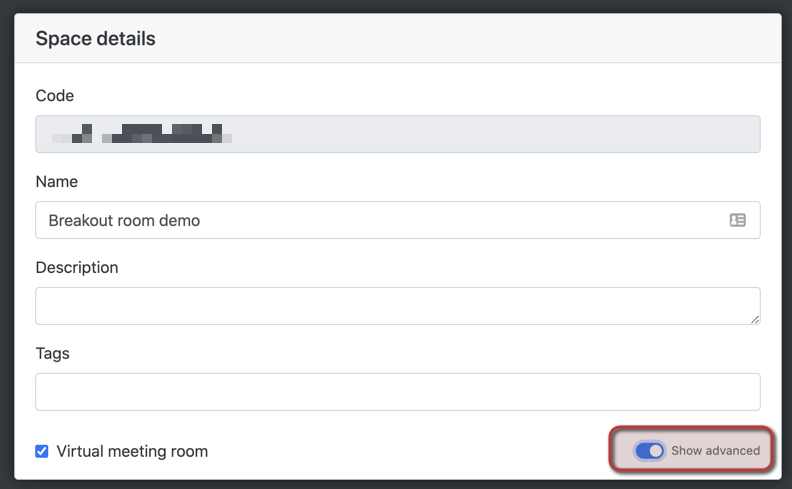
Then click on “Version” to expand that section. We try to make it as straightforward as possible to upgrade to the latest version, so if one of your spaces/worlds falls behind, you can upgrade it by clicking on “Update to latest version”.
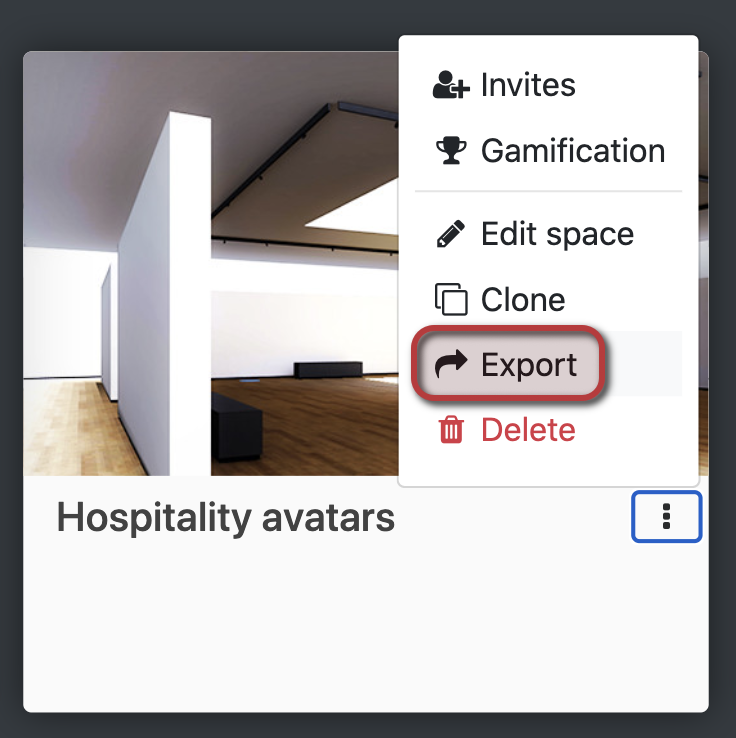
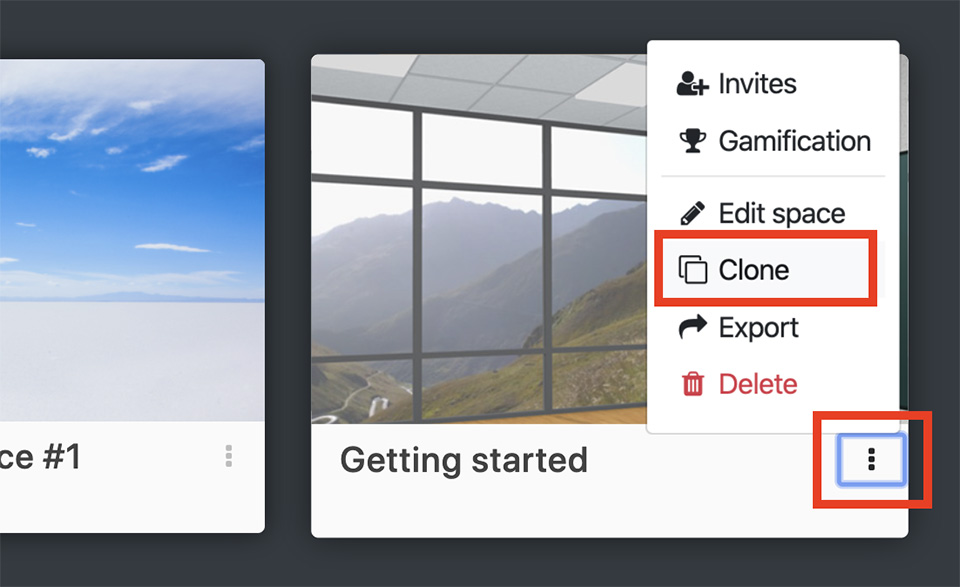
Copy/duplicate a Space or World?
This can be achieved through the “Clone” function, which allows duplicating a space with a variety of options. To do so, open the options menu of a space (the three vertical dots on the right), then click on “Clone”.
Note: cloning will always copy the configuration of a space, which are set in the “Edit space” advanced options. |
In the popup, you can simply click on the green “Clone” button, or you can show additional options by clicking the “Show advanced” button.
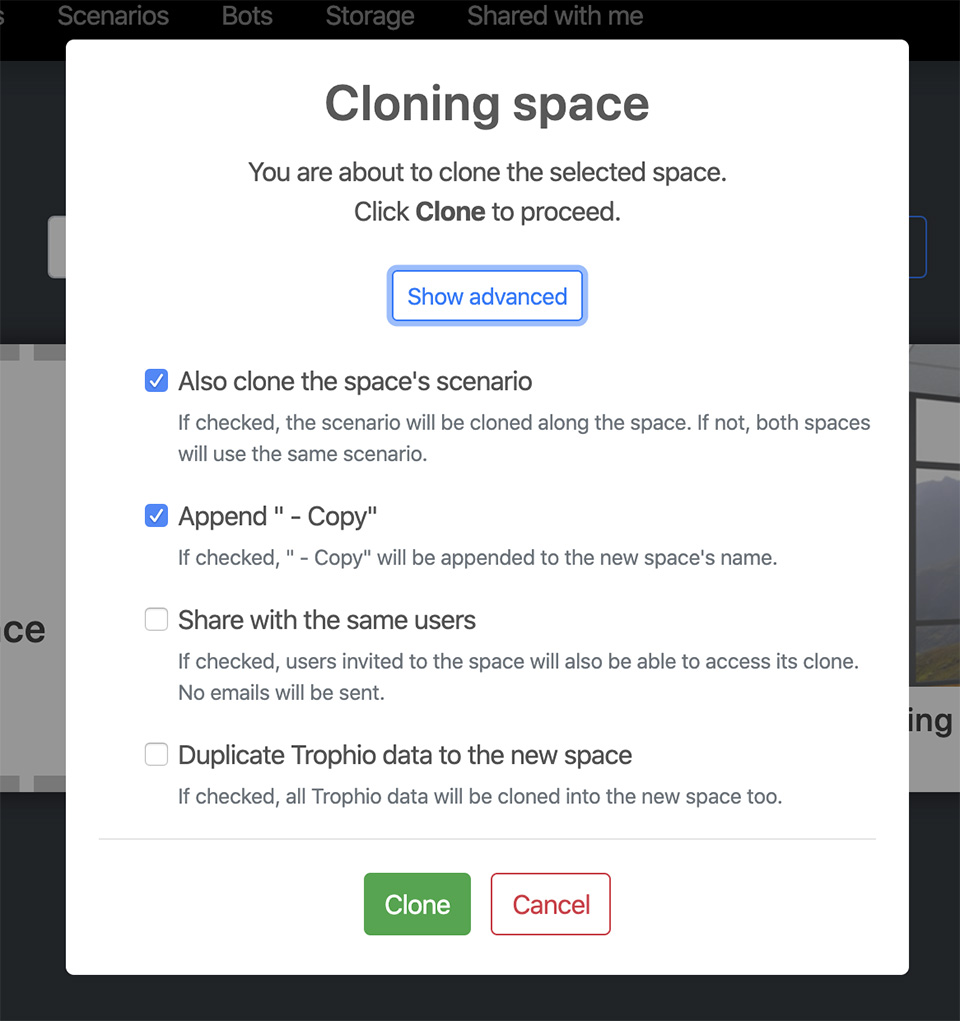
3D spaces have 4 options:
- Also clone the space’s scenario: when cloning “space A”, which uses “scenario A”, the cloning process will create a new “space B”, and also create a new “scenario B” attached to it.
If this is unchecked, “space B” will instead use the already-existing “scenario A”.
If you are in doubt whether this is useful, it’s better to leave this option checked. - Append “- Copy”: if checked, the name of the new space will have “Copy” appended, for example a clone of “My space” will be named “My space – Copy”
- Share with the same users: if checked, any user with an invite to the current space will have the same invite in the new space
- Duplicate Trophio data to the new space: if checked, tasks that exist in the current space will be copied to the new space. Note that user progress for each task will not be copied.
3D worlds have a few additional options:
- Add spaces to the new world: this will add the spaces of the original world to the new world as well
- Also duplicate each space in the world: this option will only show if the one above is checked, and when selected will add to the new world a clone of each 3D space in the original one, instead of “linking” to the original spaces.
- Also clone each scenario attached to spaces in this world: if checked, it does the equivalent for each 3D space of what “Also clone the space’s scenario” does when cloning a space, i.e. it duplicates the scenario and attaches the copy to the newly-cloned space.
Important: When cloning spaces of a world, the spaceId will change, if you are using any custom actions or scripts that use a reference to a spaceId (eg. sendUserToSpace action) these will need to be updated.
Misc
Clear my browser cache?
The specific steps required depend on the browser and device. The relevant support article can always be found by searching for “<browser> clear cache” (e.g. “Safari clear cache”) or “<device> <browser> clear cache” (e.g. “iOS Safari clear cache”).
- on Chrome: https://support.google.com/accounts/answer/32050
- on Firefox: https://support.mozilla.org/en-US/kb/how-clear-firefox-cache
- on Edge: https://support.microsoft.com/en-us/microsoft-edge/view-and-delete-browser-history-in-microsoft-edge-00cf7943-a9e1-975a-a33d-ac10ce454ca4 (the section to be cleared is "Cached images and files")
- on Safari: https://support.apple.com/guide/safari/manage-cookies-and-website-data-sfri11471 (the bullet point of interest is "Remove stored cookies and data").
Reset browser permissions (e.g. Camera, Microphone, VR)
- Chrome: https://support.google.com/chrome/answer/114662
- Safari: https://support.apple.com/en-gb/guide/safari/ibrwe2159f50
- Firefox: https://support.mozilla.org/en-US/kb/how-manage-your-camera-and-microphone-permissions
Provide access to my users without registering them on LearnBrite?
It is possible to supply some details for your users while allowing them to access as “guest” avatars. This is best used when including a LearnBrite space/world as an iframe.
On the page where your users will access the platform, add the following code (replacing MY_NAME and MY_EMAIL@EMAIL.COM with each of your users).
As guests, they will be assigned this data so that they can be identified in Trophio analytics.
<script> document.getElementById('learnbriteSpaceFrame').contentWindow.postMessage(JSON.stringify(dataMessage), '*'); |
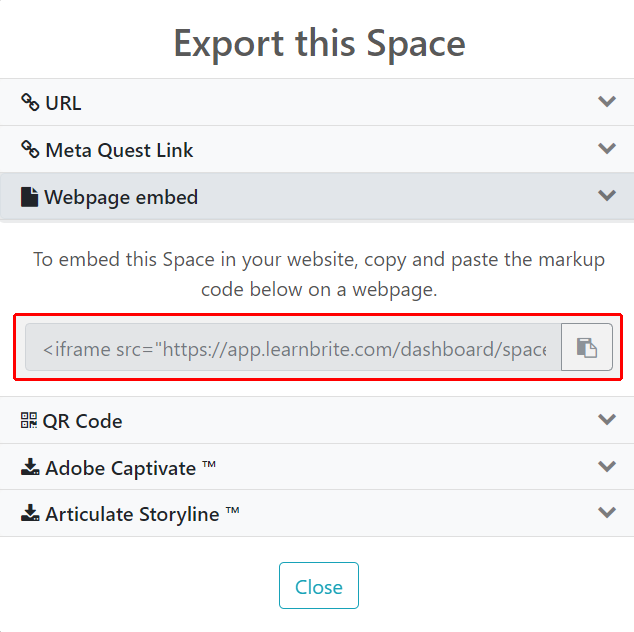
After that script, paste the export code of your space/world, obtainable from Dashboard