Jump to:
Introduction to the Six Actions
Walk-through: Creating a simple scenario with Trophio
Step 2: Create the Trophio achievements
Step 4: Enter space and add items/hotspots
Step 5: Add script and Trophio events to each person
Achievement 3) Update task: Ask Edward to update new achievements
Achievement 4) Collect item: get sweets from Jamie
Achievement 5) Drop item: give Ellie a sweet
Achievement 6) Click on item: click on any item
Achievement 4) Get a sweet from Jamie
Achievement 5) Give Ellie a sweet
Achievement 6) Click on an item
Welcome to Trophio!
Trophio is a powerful system used to add in achievements and tasks to LearnBrite scenarios.
In Trophio, there are 6 main actions that can be added:
– start task – collect item
– complete task – drop item
– update task – set item status
This tutorial is designed to do 2 things:
(1) Introduce each of the 6 main actions and what they can do
(2) Provide a guide to writing a simple scenario that includes each of the Trophio actions
Introduction to the Six Actions
These can be split into two groups: tasks and items.
Task Actions
There are three possible states for a task: "not-started", "started" and "complete".
A created task will always have the “not-started” status until it is assigned another status.
A task can move between any of the three states (can it move from “complete” to another one?)
– Start Task:
Allows a task to be started (by setting its status to “started”).
– Complete Task:
Allows a task to be completed (by setting its status to “complete”).
– Update Task:
Allows a tasks status to be changed (to “not-started”, “started” and “complete”).
Item Actions
“Items” can be added to a scenario to help create game-like conditions.
They can be attached to 3D items within the room or can be theoretical items to allow changes to occur (an item that occurs in the story or the mind of the user without being attached to a 3D item within the space).
Example of theoretical items:
– searching for a key that another character has (they “give” it to the player, but no 3D item is ever seen)
– searching for information (a code, meeting place, secret, etc) that is discovered by the player in their conversations with other characters
– Collect item: Allows an “item” to be collected/gained/received by the player.
– Drop Item: Allows the player to drop/give/lose an “item”.
– Set Item Status: Allows an item to change status. Any word or term can be used, but it must remain consistent within the scenario/script.
Walk-through: Creating a simple scenario with Trophio
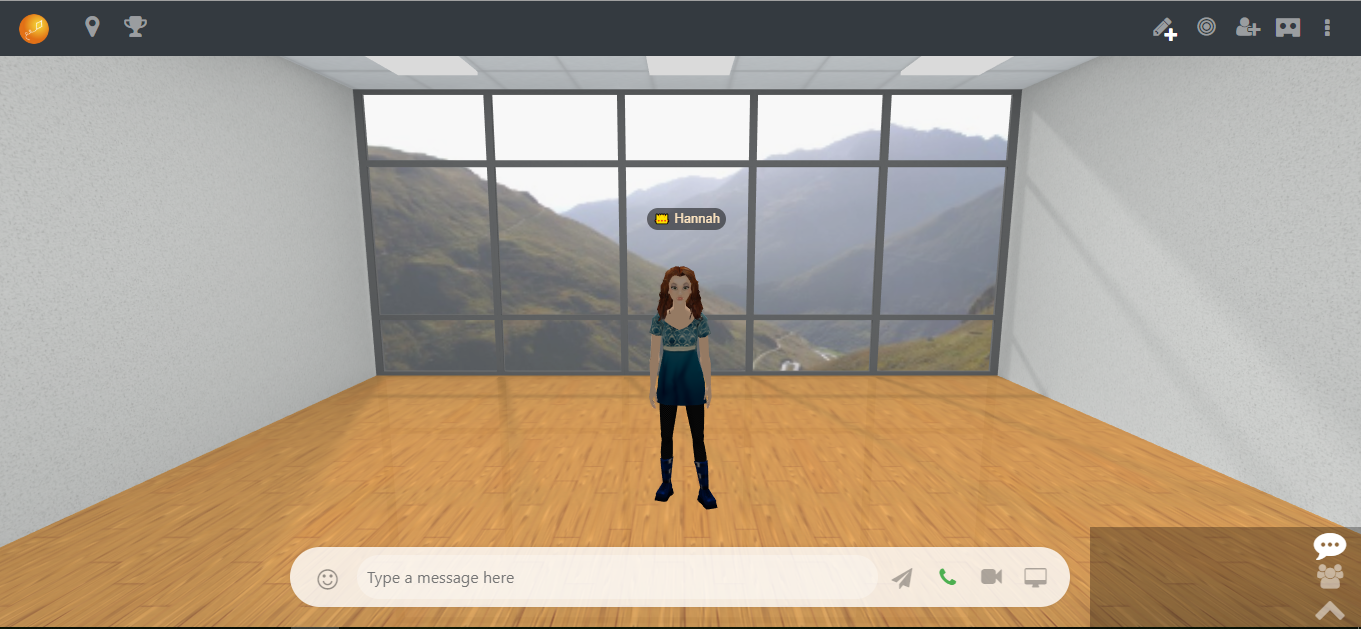
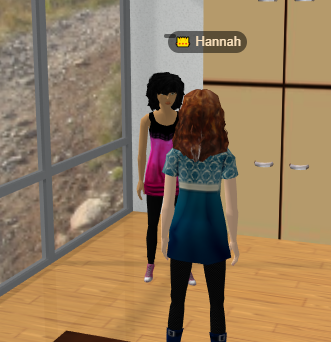
The final scenario: this is the final goal of this walk-through:
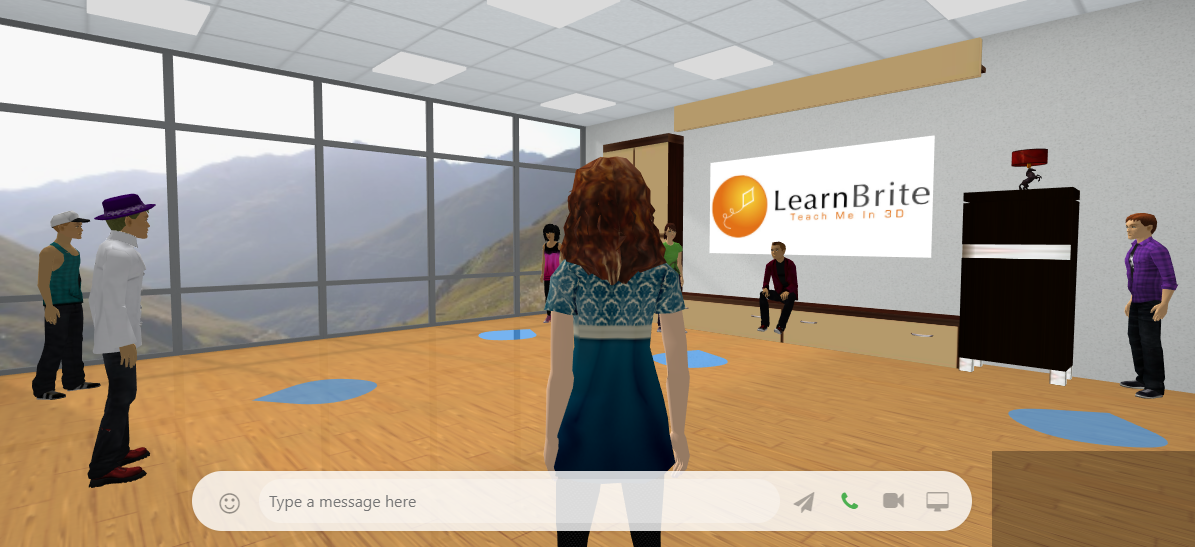
There are 6 other characters, each one will unlock/complete an achievement related to a Trophio task.
Step 1: Create a new space
Open up the dashboard.

Go to the “Spaces” tab in the Dashboard toolbar.


click on “Create new space” or the plus button.
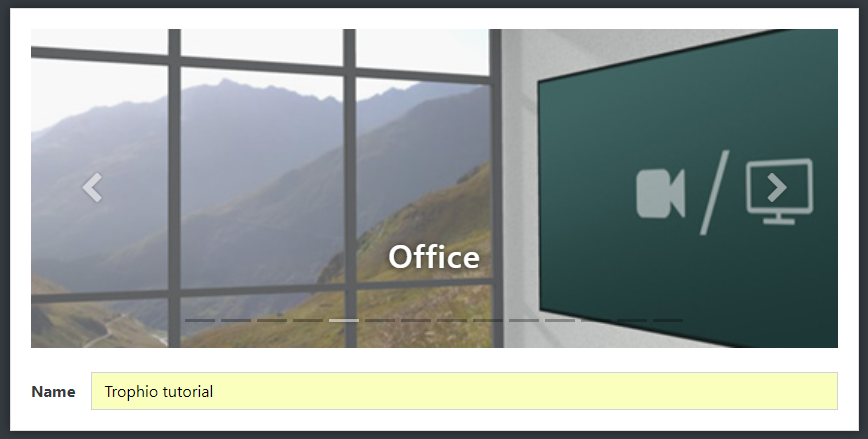
Choose the “Office” Template and give the scenario a new name.
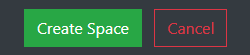
To finish, click on “Create Space”.

The new space will now be available in the dashboard.
Step 2: Create the Trophio achievements
The Trophio achievements need to be created before they can be added to a scenario. They can be added one by one as you create a scenario step by step or they can all be added at the beginning.
For this guide, they will be created now.

In the dashboard, click on the three dots (red) on the space’s thumbnail.
In the menu, choose “Gamification”.
Select the thumbnail of the scenario.

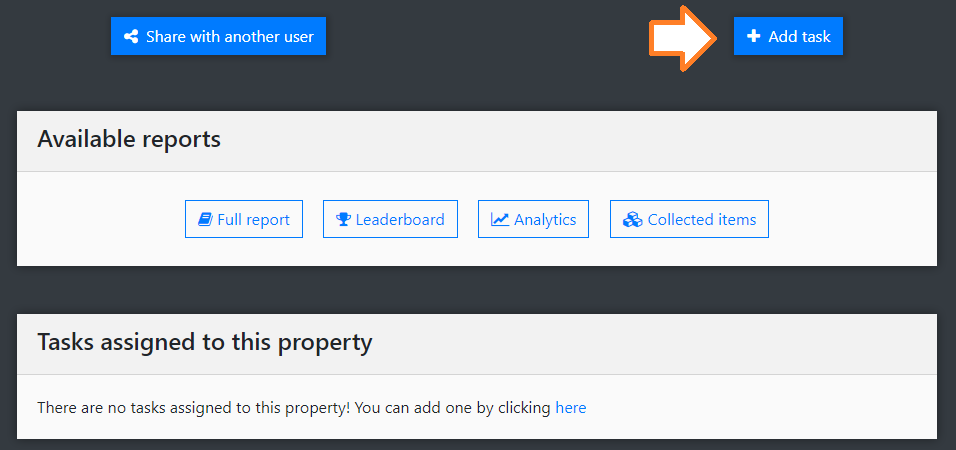
This is the Trophio screen. At the bottom it lists the tasks assigned to the space/scenario. At the moment, none are attached to the scenario.
To start adding tasks, click on “+ Add task”
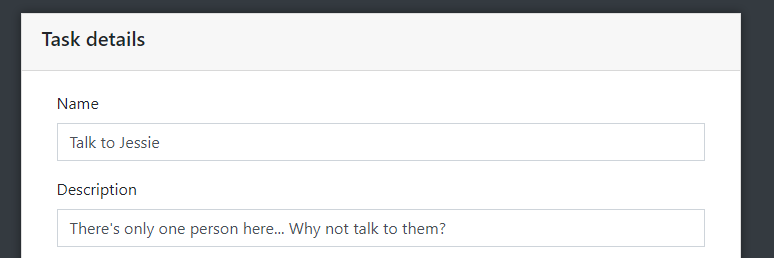
There are many fields to fill in, but for this tutorial only the first 2 are needed.
Add the following in the fields:
Name “Talk to Jessie”
Description “There’s only one person here… Why not talk to them?”

Then scroll down to the bottom and click “Save task”.

On the Trophio dashboard, the task has now been added into the “Tasks assigned” box.
There are 6 more to add to the scenario. Please follow the same process to add the information in:
Name | Description | |
2 | Find Frank | Jessie’s friend is hiding… Can you find him? |
3 | Ask Edward to update new achievements | Hmm… some of these achievements are “not-started”. Maybe Edward can help? |
4 | Get sweets from Jamie | Jamie’s got too many sweets! Who wants one? |
5 | Give a sweet to Ellie | Ellie loves sweets. Why not share them round? |
6 | Click on an item | With so many things here, try clicking on something! |
7 | Check out Psychic Bob’s amazing ability! | It must be seen to be believed! |
Step 3: Create bots
This space needs 6 different characters: Jessie, Frank, Edward, Jamie, Ellie and Psychic Bob.
First, Jessie will be created.
Click on the “Bots” tab in the dashboard toolbar.


Click on the “Create” button to make the first bot.
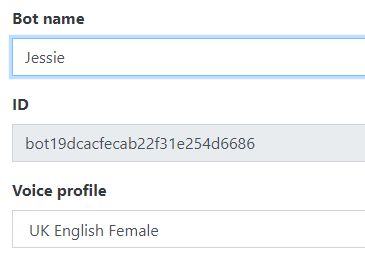
Change the name from “bot1” to “Jessie” and select “UK English Female” for Voice profile.

Then click “Continue”.

The Bot creation window will appear.
The main fields to change are gender, hair, skin, torso, legs and feet (although changes to any other field are welcome).

First change the gender to “Female”

Find the “hair” field.

Click on the “v” arrow (red) to bring up the menu.

Scroll through and click on “Curly Bob Black”

Check that skin is set to “Almond”.
Set torso to “Sweet Heart Tunic in Flamingo”
Set legs to “Black denim skinny jeans”
Set feet to “Pink sporty bootie”
At the end, Jessie should look like this.

To save her appearance, click on the orange “Continue” button
Here are recipes for another 5 bots (although feel free to create new bots)
Gender | Hair | Skin | Torso | Legs | Feet | |
Frank | Male | Short red | Freckles tan | Purple Plaid Dress Shirt and Tee | Denim blue jean | Black athletics |
Edward | Male | Old school hat | Olive | Phoenix tank | Loose Fit Black Jeans | Blackgray Skate Shoes |
Jamie | Male | Ivy Leave Dirty Blonde | Olive | Magenta velvet blazer & black undershirt | Black Formal Slacks | Red cross stitch black sneaks |
Ellie | Female | Ponytail with Bangs Brown | Honey | Green Peace Tee? | Purple plaid jeans | Purple plaid chucks |
Psychic Bob | Male | Spiked Mohawk Teal | Olive | Tdelon’s melting pole coat | Slim Fit Dark Blue Jeans | Red boots |
Step 4: Enter space and add items/hotspots
Cick on the thumbnail in the “space” tab of the dashboard to open up the space
Add Items

Click on the edit button
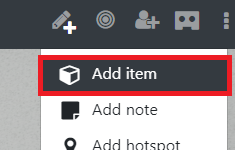
Select “add item”
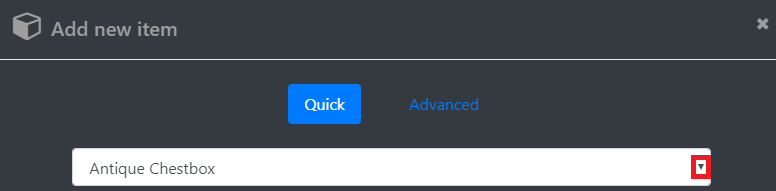
In the “Add new item” menu, click on the triangle arrow and scroll down to choose “Drawer European Woodenedge”.

There is always a preview of the object (to see it before adding it to the scene).

Then click “Add item”
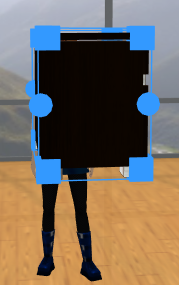
The item will appear in the room (floating in the air). There are two ways to move the item:
- Manually drag it to where you want it to be
- Enter the precise location you want it to be in
To help with precision, the precise coordinates for each item will be given in this tutorial.
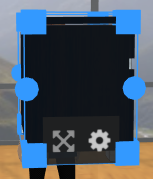
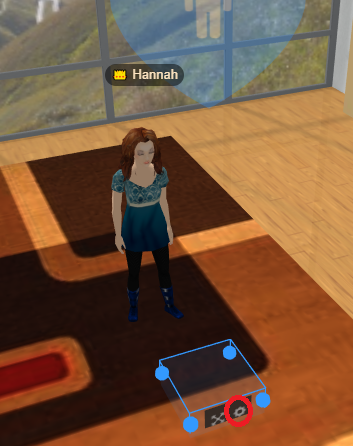
To add them in, hover the mouse over the item until you see these two icons. Click on the cog.
This opens up the editable item menu:

Paste the following values into their respective fields:
Position: {"x":2.7449294876480614,"y":0.9245515735652026,"z":-3.6914594458310104}
Rotation:{"x":0,"y":-3.141592653589793,"z":0}
Scale:{"x":1,"y":3,"z":1}

Then click “Save item”
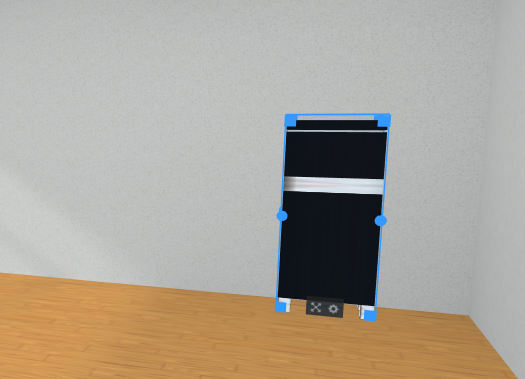
The tall, dark cupboard is now at the side of the room.
To move an object manually, hover your mouse over the object and look at the wireframe box around it.


If it is blue, you can drag it to a new location.
If it is gray, click on the crossed arrows to turn it blue. Then it can be moved.
Another 6 items need to be added to the scene in the same way:
Item Name (1) | Tvset Floorcabinet |
Position | {"x":-2.3215311951794244,"y":1.5015555254847615,"z":-3.781172029698314} |
Rotation | {"x":0,"y":-1.5707963267948966,"z":0} |
Scale | {"x":1,"y":2,"z":1} |
Item Name (2) | Dogtrill Lamp Horse |
Position | {"x":2.7818374643171673,"y":2.0173985747803047,"z":-3.8461753779649737} |
Item Name (3) | Tvset Floordrawer |
Position | {"x":0.3684818004990136,"y":0.25397062882401006,"z":-3.710449637946474} |
Rotation | {"x":0,"y":-1.5707963267948966,"z":0} |
Scale | {"x":1,"y":1,"z":1.25} |
Item Name (4) | Tvset Hangingshelf |
Position | {"x":0.3896021431559896,"y":3.22680649532952,"z":-3.7239838059066908} |
Rotation | {"x":0,"y":1.5707963267948966,"z":0} |
Scale | {"x":1,"y":1,"z":1.25} |
Item Name (5) | Rug6 |
Position | {"x":-0.18207738042735855,"y":0.026311185948756297,"z":0.5316365929422477} |
Scale | {"x":0.7,"y":0.7,"z":0.7} |
Item Name (6) | Vase Decorative Polishwhite |
Position | {"x":1.1077019828925447,"y":1.4057841777760636,"z":3.599792382411462} |
Add Mediaboard
The final item to add is a mediaboard.
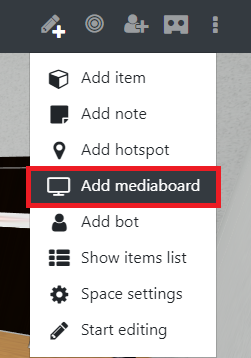
This time, go to the edit menu and select “Add mediaboard” (not “add item”)
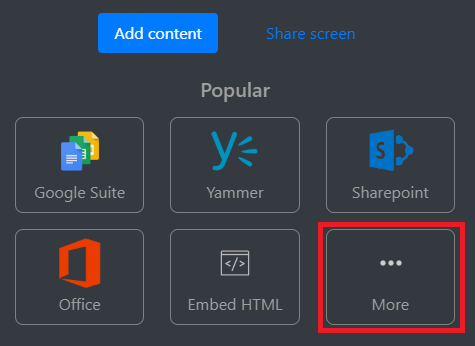
Choose “More” in the Add content section

Paste in this URL: https://cache.learnbrite.com/logos/Learn.jpg

And click “Embed”

Then either drag and rotate the mediaboard to sit on the wall, or put in the coordinates directly:
Position | {"x":0.4110828520204133,"y":1.82755327531754,"z":-3.9899999999999998} |
Rotation | {"x":0,"y":1.5707963267948966,"z":0} |
Scale | {"x":1,"y":0.6900000000000001,"z":1} |
Add Hotspots
Hotspots have two important uses within spaces: they can be used by the player to move around or bots can use them as a place to stand (or sit).
In this tutorial, the player movement hotspots will be added first.
Click on the edit button
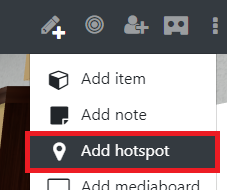
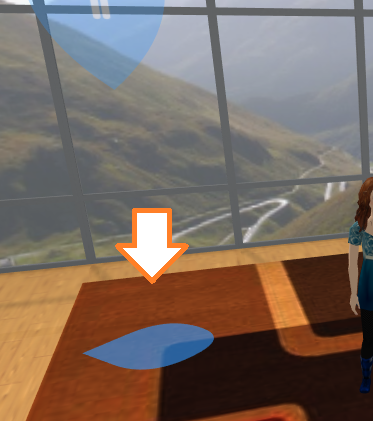
Choose “Add hotspot”
The space will automatically enter “edit mode” and the hotspot will appear in front of the avatar.
(Hover the mouse in front of the avatar until the blue wireframe box appears)
Click on the cog to open up the editable item menu.
Paste these values in:
Position: {"x":-1.34650384832968,"y":0.0441328254850455,"z":1.6096126947754383}
Rotation: {"x":0,"y":-1.658062789394613,"z":0}
The hotspot will move to its new position.
There are 4 more player movement hotspots to add in:
Position | {"x":-2.2978189095646764,"y":0.044132825485046136,"z":-1.0729749420544654} |
Rotation | {"x":0,"y":1.9198621771937625,"z":0} |
Position | {"x":0.24585962877618414,"y":0.01882163732143334,"z":-1.8211383499595994} |
Rotation | {"x":0,"y":2.007128639793479,"z":0} |
Position | {"x":3.414739904628159,"y":0.0009999084530899465,"z":-2.0943553689506706} |
Rotation | {"x":0,"y":1.3962634015954636,"z":0} |
Position | {"x":3.028922050371082,"y":0.04362236615349255,"z":2.530913372118724} |
Rotation | {"x":0,"y":2.705260340591211,"z":0} |
Add Bots
Now, it is time to add the 6 characters. It is the same process as adding a hotspot but we add in a few more details.
Add a new hotspot and click on the Cog to open up the editable item menu.

Add in the following details:
Position: {"x":-2.8256010465077552,"y":0.0009998990633813803,"z":-2.352378155866395}
Rotation: {"x":0,"y":-1.0471975511965976,"z":0}
Avatar_externalId:
Avatar_name:
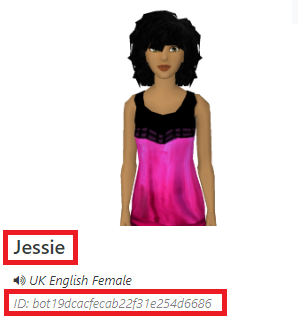
The last two fields can be found on your Bot page. Under every bot, they have their name and the ID. Paste in these two figures into the above fields.
In this example, you would paste in:
Avatar_externalId: bot19dcacfecab22f31e254d6686
Avatar_name: Jessie
Here is the information for the other 5 characters (remember to find the unique bot ID for the bot created on your account):
Position | {"x":3.6441373899915943,"y":0.0009998331638075822,"z":-3.6419698023098683} |
Rotation | {"x":0,"y":-2.5307274153917776,"z":0} |
Avatar_name | Frank |
Position | {"x":-2.662562110522421,"y":0.0010001418697634917,"z":3.245600054167427} |
Rotation | {"x":0,"y":1.2217304763960306,"z":0} |
Avatar_name | Edward |
Position | {"x":0.4217971137481813,"y":0.19143206412946695,"z":-3.2005864837561915} |
Rotation | {"x":0,"y":-1.48352986419518,"z":0} |
Avatar_name | Jamie |
Posture* | chair |
* Posture allows the player or bot to stand or sit (chair) in the hotspot
Position | {"x":-1.0519127365609044,"y":0.0009998542588928166,"z":-3.1210543407070483} |
Rotation | {"x":0,"y":5.672320068981571,"z":0} |
Avatar_name | Ellie |
Position | {"x":-0.2752263681859055,"y":0.0010001542408472047,"z":3.5286142988581695} |
Rotation | {"x":0,"y":1.7453292519943295,"z":0} |
Avatar_name | Psychic Bob |
Step 5: Add script and Trophio events to each person
Now it is time to add the seven achievements into the scene!
Achievement 1) Talk to Jessie
Action focus: complete task and start task
Move closer to Jessie (it is easier to edit objects when they are closer)
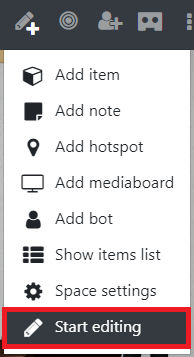
Enter edit mode by choosing “Start editing”
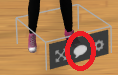
Hover over Jessie’s feet until the grey wireframe box appears. Click on the second icon (the speech bubble) to open up the script editor.

Click on the dialogue box and type in “I’m waiting for my friend, Frank” (without the speech marks).
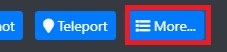
Click on “More…”
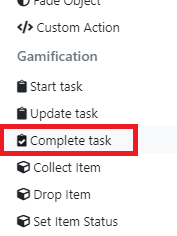
Find “Complete task” in the Gamification section of the actions list.
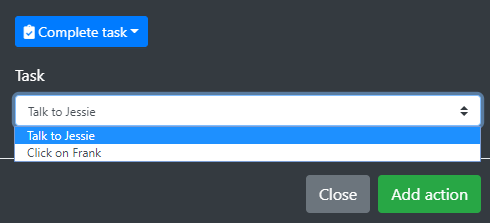
In the drop down menu, select “Talk to Jessie” and then click “Add action”.
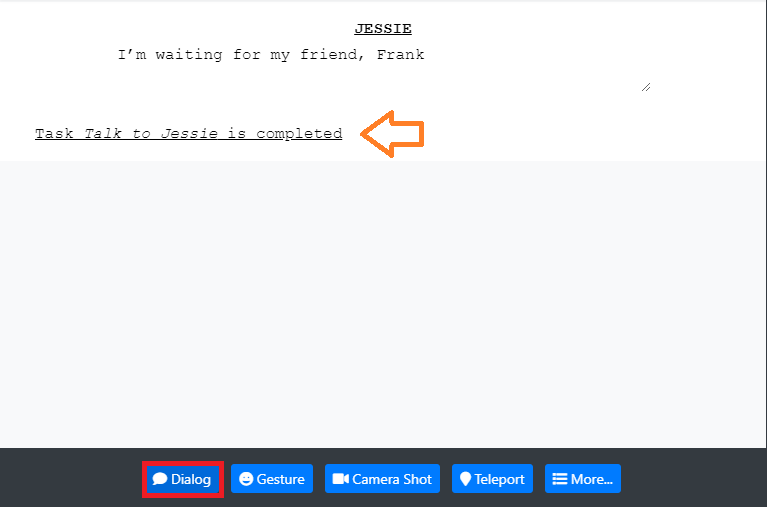
Now there is a line: “Task Talk to Jessie is completed”
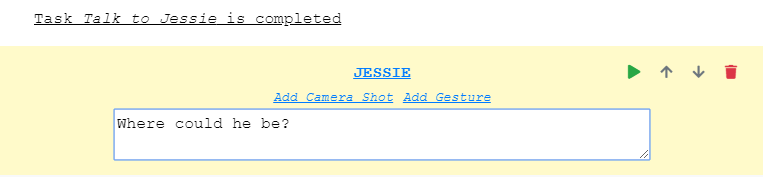
Click on the “Dialog” button to add a new dialogue node.
Paste or write in “Where could he be?”.
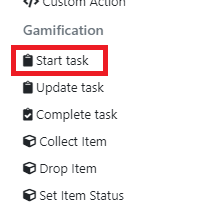
Click on “More” again and this time select “Start task” from the action list.
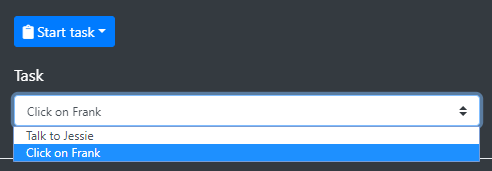
Select “Click on Frank” from the dropdown menu and then click “Add action”
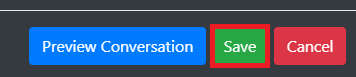
When you are finished, click “Save”.
Achievement 2) Find Frank
Action Focus: complete task and start task (repeat)
To start, follow the same procedure for Achievement 1.
- Add a dialogue node “Shhhh! I’m hiding from Jessie!”
- Add a “complete task” action for “Find Frank”
- Add a dialogue node “Don’t tell!!”
- Add a “start task” action for “Ask Edward to update…”
Achievement 3) Update task: Ask Edward to update new achievements
Action Focus: update task
Although it is more common to use the “complete task” or “start task” actions, it is useful to know how to update the status.
Edward is going to update all the “not-started” tasks to be “started” and update his achievement to be “complete”.
- Start by opening up the script editor
- Create a dialogue node that says: “Oh, yeah! You’re completing achievements, right? | Give me a moment to check your progress!”
Now, we will add an “update task” action for 4 of the tasks:
Click on “More…” to open up the action menu.
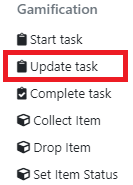
Select “Update task”

Then choose the Task “Get sweets from Jamie” and change the status to “Started”.

Then click “Add action”.
- Add in 3 more “update task” actions tasks “Give Ellie a sweet”, “Click on an item”, “Check out Psychic Bob’s amazing abilities!” to update them to “started”
- Create a dialogue node that says: “So, I may have lost my note about where you got to… | So I set all available tasks to “started”.”
- Add an “update task” action for “Ask Edward…” to update it to “complete”
- Create a dialogue node that says: “I also updated this task to be “complete”! | Does that help?”
Remember to click “Save” on the script editor window before closing it!
Achievement 4) Collect item: get sweets from Jamie
Action Focus: collect item
Open up the script editor for Jamie,
- Add a dialogue node saying "Here, give some sweets to Ellie! | She LOVES them!"
To add in a “collect item” action, click on “More…”

And select “Collect item” from the Gamification section.
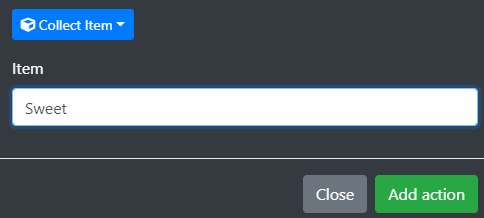
Write in “Sweet” for the item and then click “Add action”.
As an extra, a notification will now be added in.
Click on “More…”
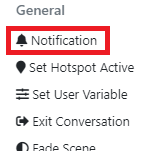
Clcik on “Notification” from the General section
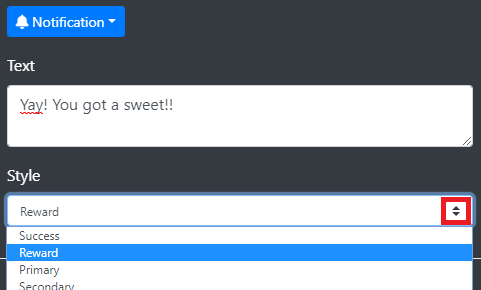
Here, a message is required in the Text section. Paste or type in “Yay! You got a sweet!!”
In the style menu, click on the up/down arrows and select the style (colour) that you want.

Then click on “Add action”.
- Finally, add a “complete task” action for “Get a sweet from Jamie”.
Achievement 5) Drop item: give Ellie a sweet
Action Focus: drop item
Start by adding a “drop item” action. Open the script editor and click on “More”:
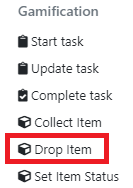
Select “Drop item” from the Gamification section.

Write “Sweet” in the Item field and click “Add action”.
- Add a “Notification” action with Text: “You gave Ellie a sweet!”
- Add a dialogue node saying "Wow, thanks for the sweet! | I feel like it's my birthday"
- Finally, add a “complete task” action for “Give Ellie a sweet”.
Achievement 6) Click on item: click on any item
Action Focus: set item status
Click on item – complete
Notification: “A secret achievement has been unlocked! Sweet!”
© 2022 LearnBrite™
Trademarks & Copyrights are property of their respective owners. Pictures are indicative only & may not reflect final production.