Jump to:
1. Downloading and importing the file
3.4 Assign the scenario to the space
1. Downloading and importing the file
To start using ChatMapper, the Scenario Template can be downloaded. It is recommended to use this file to start a new project, especially in the case of ChatMapper beginners, as it comes with Actors, custom fields, and conversations already set up.
After clicking on the link, a “Download” window will appear – click Save.

Note that ChatMapper is a Windows-only tool – if you are using macOS or a Linux distribution, you will need to run it in a Windows VM (such as Parallels on macOS, or Wine on Linux). This guide assumes you are using Windows.
There are two types of files commonly encountered when working with ChatMapper. CMP files do not bundle external assets, and are suggested for most projects (most assets, such as 3D models, can be imported directly into the LearnBrite platform). It is however possible to export a bundled version of the CMP which will include the assets imported into the ChatMapper project as well – there are “CMPKG” (ChatMapper Package) files, like the Scenario Template. |
Open the file after downloading – ChatMapper will import it, and will ask to open the project. Click Yes.

If you have already imported the project in the past, ChatMapper will ask to overwrite the existing import first. In that case, click Yes, and then open the project when asked.

By default, the project will be saved in the following folder:
C:/Users/USERNAME/Documents/Chat Mapper/Imported Packages
2. Using ChatMapper
A detailed guide on ChatMapper can be found at the Hyperspace Academy.
The Template has been set up with Actors and Conversations.
Actors
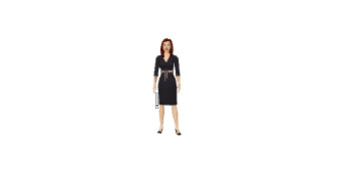
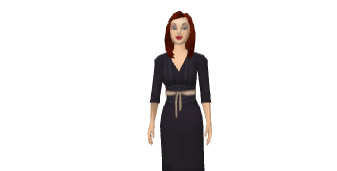
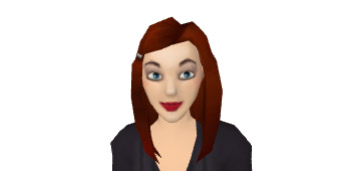
The project includes four Actors: Player, Narrator, Jane, and Michael.
Tok see the details of each actor and modify them, click on their name on the left pane, and their details will be displayed on the Properties pane (on the right by default).

Both Player and Narrator are special actors.
Player
Player is the character of the user, must have isPlayer checked and isNPC unchecked. In the screenshots some additional details are defined, such as the player’s Voice (UK English Male).
Narrator
Narrator is also a special actor, representing the “camera” in the experience. To work as such, it must have no avatar_externalId, and both isPlayer and isNPC must be unchecked. Whenever a dialogue node has the Conversant set to Narrator, the avatar who is speaking will look directly at the camera (it will otherwise look at the Conversant’s avatar). If Narrator is set as the Actor of a node, the camera will not move from its previous position.

Jane and Michael are normal actors. Taking Jane as an example, here are all her properties and what they do:
Name
The actor’s name, also used within Scenario (it is displayed above a character’s head).
Pictures
This is an image used purely for decorative purposes within ChatMapper, to show an actor’s image in a conversation.
Any image can be used, though it should be placed within the same folder as the .cmp file (in the case of the template project, “C:/Users/USERNAME/Documents/Chat Mapper/Imported Packages/Scenario Template”).
If placed outside of that folder, it will not be included correctly in any .cmpkg (ChatMapper Package) exported.
Description
used only in ChatMapper – will fill the tooltip that shows when hovering over a character, useful to show some additional information about the actor that is not critical.
IsPlayer
This should be unchecked for every Actor that is not the user’s.
onclick
The action to trigger when clicking on the avatar within the 3D environment. Please refer to the Scenario Actions guide for more details.
The “onclick” of Jane and Michael do something straightforward: Jane’s launches the conversation called “Conversation with Jane”, and clicking on Michael starts “Conversation with Michael”.
avatar_externalId
This is an ID that can be obtained from https://app.learnbrite.com/bots , where you can create your own bots.
avatar_spotTag
Name of the hotspot where the actor should be placed within the 3D environment.
isNPC
Is checked (as it should for every character that is not the user’s).
isPIP
Sets the actor to appear as a picture-in-picture avatar. When the actor is speaking, they will appear in the bottom-right corner (as opposed to the camera moving and focusing on them), and disappear when the first node with a different actor is played.
Voice
The actor’s voice, from ResponsiveVoice’s catalog.
Voice_parameters
Additional parameters for the actor's Voice (pitch, rate of speech, volume). See Speech, SFX, Ambient > How to Make Actors using the Same Voice Sound Different
avatar_height
The height of the camera when the actor is speaking. When left empty, the camera will adjust its height automatically.

Conversations
Conversations are closed by default when a CMPKG file is imported. To open one, double-click on it. |
In the project are two conversations, “Conversation with Jane” and “Conversation with Michael”. You can open each by going to the “Conversations” tab in the left pane and double-clicking on any of the two.

If at any point you either double or single-click on the conversation, its properties will appear in the right pane, in the same way Actor properties do. A couple of different fields are available for conversations out of the box:
Title
The conversation’s title. If multiple conversations are present (such as with the template) but either all or none are set to Autoplay, a list of conversation titles will appear for the user to choose which they want to start.
Pictures
This is an image used purely for decorative purposes within ChatMapper, to show an image on the side of a conversation’s title in the “Conversations” pane. See the note on where to place the images in the same field within the “Actors” section.
Description
A description of the conversation. Purely for descriptive purposes, it does not appear anywhere within a space.
Actor
The main Actor of the conversation. It does not impact a scenario (any number of Actors can participate in a conversation), but can be useful to set for descriptive purposes.
Conversant
The counterpart to the main Actor of the conversation. It does not impact a scenario (any number of Actors can participate in a conversation), but can be useful to set for descriptive purposes.
Autoplay
If one (and only one) conversation has this checked, it will start automatically when the scenario is loaded.
Location
Set to the only location available. Should generally be left unchanged.
Conversation_onend
Sets the behaviour of the scenario when a conversation ends. Can be one of “stay” (which leaves the space in exploration mode, where one can move and look around freely), or “return” which shows a list of possible conversations to select.
camera_animationTime
The amount of time (in seconds) used by the camera to move between one camera angle and the next (see “avatar_shot” in the Dialogue Nodes section). It’s set to 0 in the template, equivalent to a jump cut in movies.
delay_enter and delay_exit
The amount of time (in seconds) to delay the start or the end of multiple nodes spoken by the same Actor. Best left to 0.
Choice_position
Where to position choices. They will be in the center of the screen if this is left empty or an invalid value is used. Other possible values are “top” and “bottom”.
The conversation with Jane includes some helpful tips on using ChatMapper, as well as one of the most important interactive elements in dialogue: a choice (highlighted in ChatMapper using red, white and green nodes). All of this can and should be modified as needed.
Dialogue nodes
When opening a conversation, a tree structure is shown, also known as the dialogue tree. Each of these dialogue nodes, when clicked on, also has its own properties.
If the same property is set for both a conversation and a dialogue node (for instance delay_exit), the value in the dialogue node takes precedence and will be used. |
Title
The node’s title, appears in the dark gray bar at the top of a node within the dialogue tree.
Pictures
Images used purely for decorative purposes within ChatMapper, to show an image within the dialogue node instead of the Actor’s (if set – if neither this nor the Actor’s image is set, a default icon will take their place). See the note on where to place the images within the “Actors” section.
Description
A description of the dialogue node. Purely for descriptive purposes.
Actor
Who will speak the node. Other actors close enough will look at him or her while they are speaking.
Conversant
The counterpart to the main Actor of the node, does not usually have an effect. If set to the Narrator if the speaking avatar should look directly at the user (see “Narrator” in the “Actors” section). It should be set to the avatar whose shoulder the camera rests on for OSL and OSR avatar_shot nodes (more on this below).
Menu Text
If set, it will display a button. Multiple dialogue nodes at the same level, i.e. children of the same parent node, will create a group of choices (see relevant section in the ChatMapper Cookbook)
Dialogue Text
The text that will be spoken by the Actor of the node. Can be separated by pipes | to split audio and closed captions in multiple “pieces”.
Parenthetical
Doesn’t appear within the spoken dialogue, but will appear before the Dialogue Text in Screenplay exports. It usually contains stage directions, or describes emotions (such as “nervously” or “with a broad smile”).
Audio files
By default, LearnBrite uses text-to-speech, but audio files can be used as well. Audio files included within this field will be played instead of TTS. To synchronize them with captions, be sure to include a pipe (“|”) where each file stops. For example, if one audio file contains the text “Hello” and the second “how are you?”, to sync audio and captions the Dialogue Text should be “Hello|how are you?”
Video files
Unused, should be left untouched.
choiceCaption
When set, a small header will appear above a choice list containing this text, very useful to create recaps of what was just said, or to repeat a question for a multiple-choice answer. This should be set in a child node (i.e. when a node has multiple children, to make it show it should be set within the children, not the parent). If multiple children have different choiceCaptions, the first will be used.
Avatar_shot
Which camera shot to use for this dialogue node. Note that in 1st person and VR modes, camera control is left completely to the user, and logically this field will not appear to have an effect even if it is set. Can be one of:
- XLS
- LS
- MLS
- MS (the default)
- MCU
- CU
- BCU
- XCU
- OSL (in this case and for OSR, Conversant cannot be the Narrator actor)
- OSR
XLS (Extra Long Shot) | LS (Long Shot) | MLS (Medium Long Shot) | MS (Medium Shot) |
| |||
MCU (Medium Close Up) | CU (Close Up) | BCU (Big Close Up) | XCU (Extra Close Up) |
OSL (Over the Shoulder, Left) (2.9+) | OSR (Over the Shoulder, Right) (2.9+) |


camera_animationTime
See the same section within the “Conversation” part of this document.
delay_enter and delay_exit
See the same section within the “Conversation” part of this document.
choice_style
If left empty or set to “vertical”, choices will be grouped vertically. If set to “horizontal”, choices will be grouped horizontally. As with choiceCaption, this should be set for children, not parent node of a choice.
3. Uploading to Dashboard
3.1 Export the CMPKG
When the project is ready to be tested, go to File > Export > ChatMapper Package (CMPKG). This will create a package like the original Scenario Template one.
3.2 Create the scenario
The package can be uploaded directly on the Hyperspace Dashboard > Scenarios page.
On that page, click on Create a new Scenario, fill in the form with a name for your scenario (it will not be visible to users, so it can be named as you prefer) and choose the recently-exported CMPKG file. Click Create to upload the package file and create the scenario.
3.3 Create the space
On the Dashboard page, click on Create a new Space. In the next page you can choose one of the many environments included in the platform, as well as a name for the space (which is visible to users) and whether the space is a Virtual Meeting Room (i.e. if users are in a multi-user session, or in a single-user one). Create the space by clicking on Create Space at the bottom.

3.4 Assign the scenario to the space
In the list of spaces on the Dashboard homepage, click on the three vertical dots on the new space, and select Edit Space

At the bottom of this new page, click on Show advanced settings, and expand the section called Scenario. Then select the scenario you just created from the dropdown, and click Save at the bottom. You’re done!

You can now access your space by clicking on it on the Dashboard homepage. Enjoy!